
Create your store
It takes about 2 minutes and your store goes live straight away — on the Free plan, or on a 14-day free trial of a paid plan. No payment needed now.
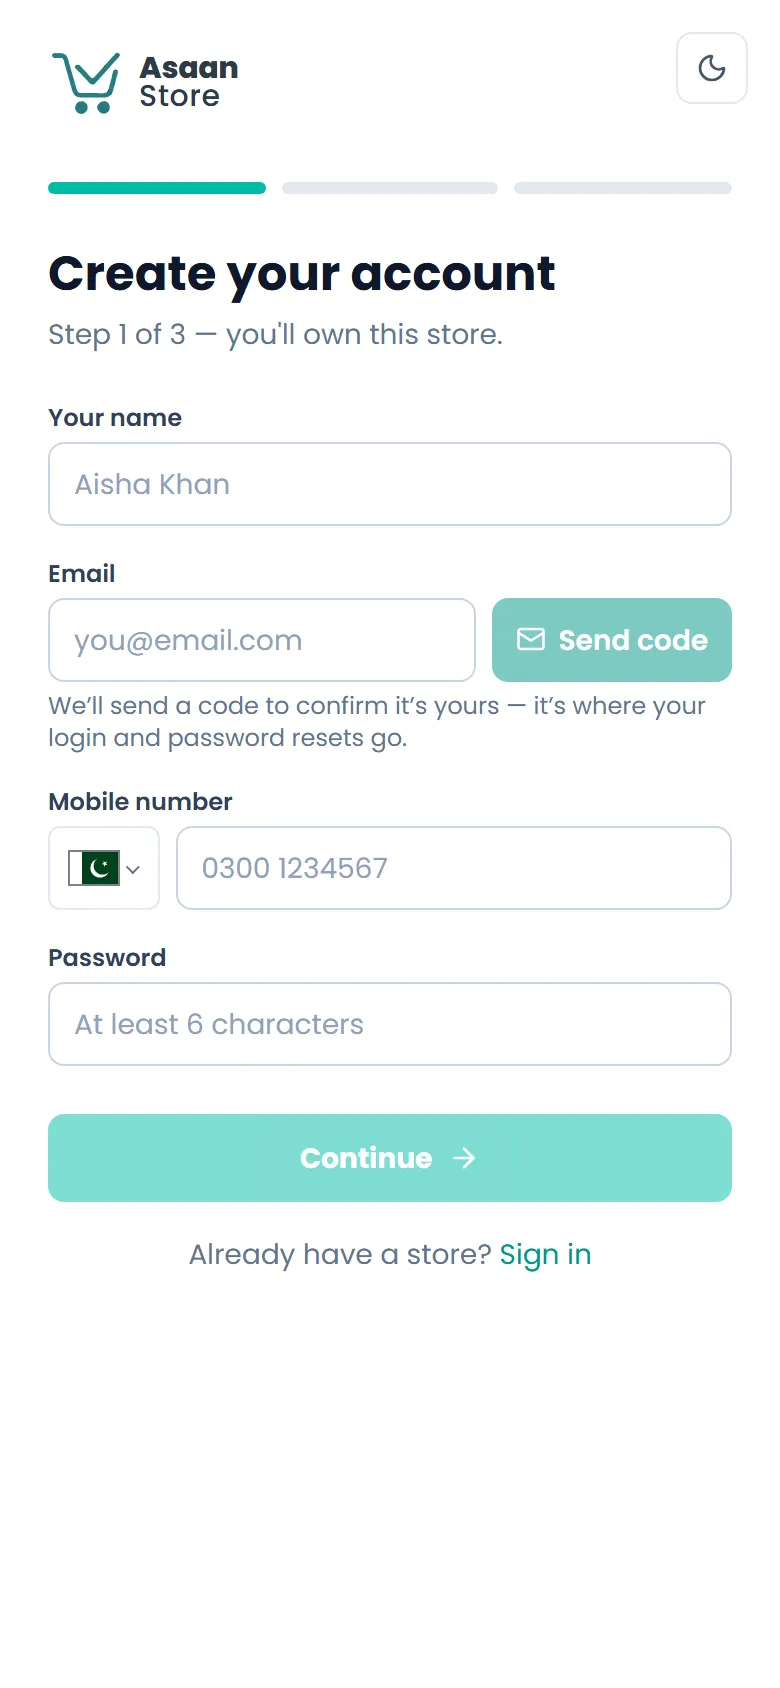
- 1Go to asaanstore.com and tap Get started.
- 2Enter your name.
- 3Enter your email and tap Send code. Type the 6-digit code from your email and tap Verify. This is the email you'll sign in with.
- 4Enter your mobile number and choose a password (at least 6 characters). Write it down somewhere safe.
- 5Next, name your store. The name becomes your web address — for example noorboutique.asaanstore.com. Choose what you sell.
- 6Pick a plan and tap Create my store. You can change plans later.
- 7Tap Go to my dashboard. We also email you a button that signs you straight in.
Sign in to your dashboard
Your dashboard is where you add products, see orders and change your store. There's one address to remember.
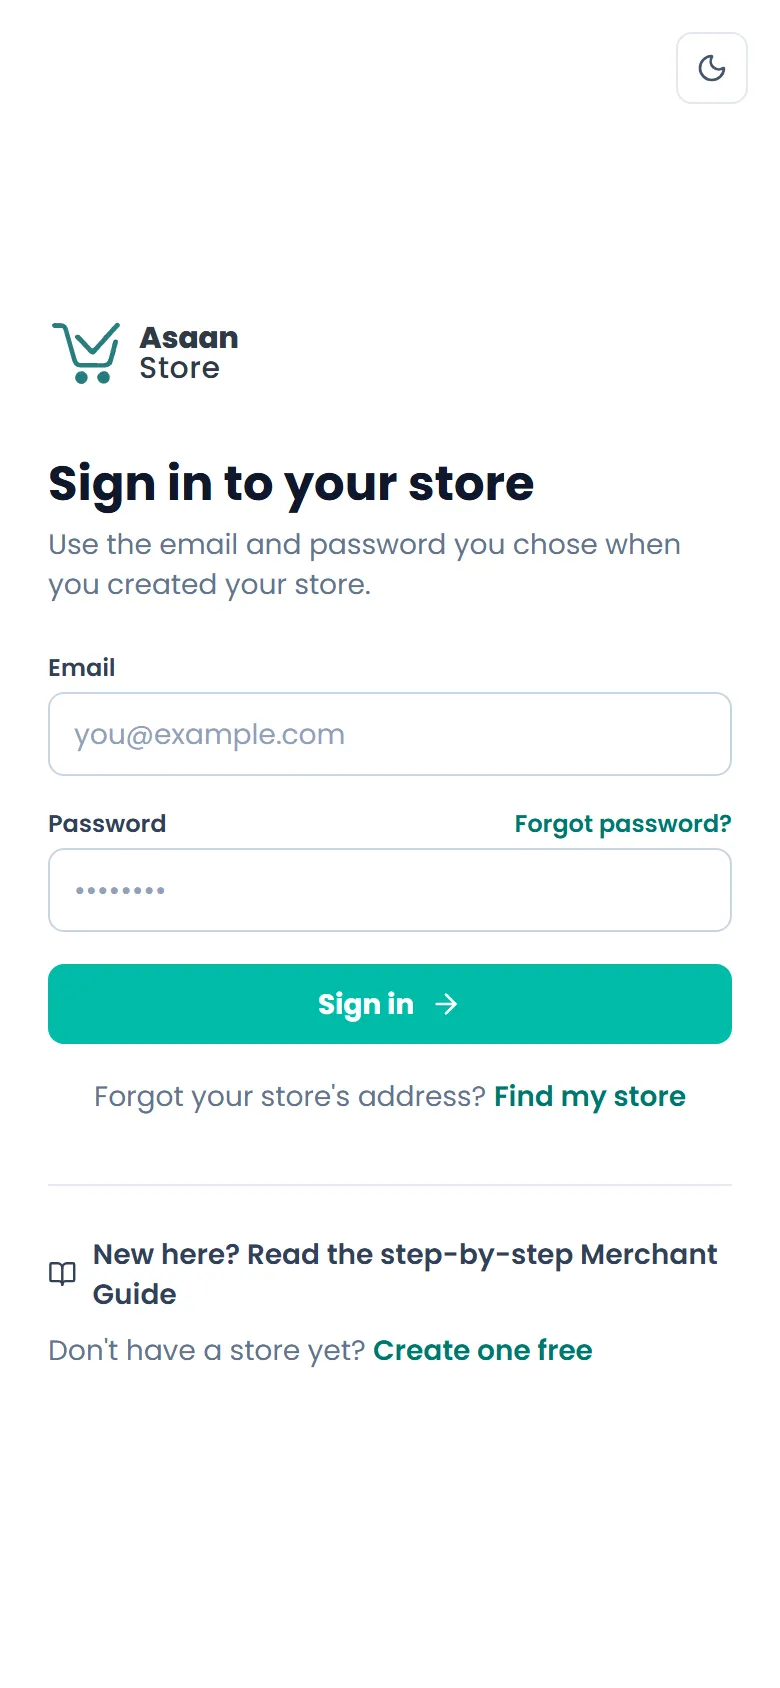
- 1Go to asaanstore.com/login (or tap Sign in on asaanstore.com).
- 2Enter the email you signed up with.
- 3Enter your password and tap Sign in. We take you straight to your store's dashboard.
Forgot your password or store address?
No problem — we'll email you everything you need to get back in.
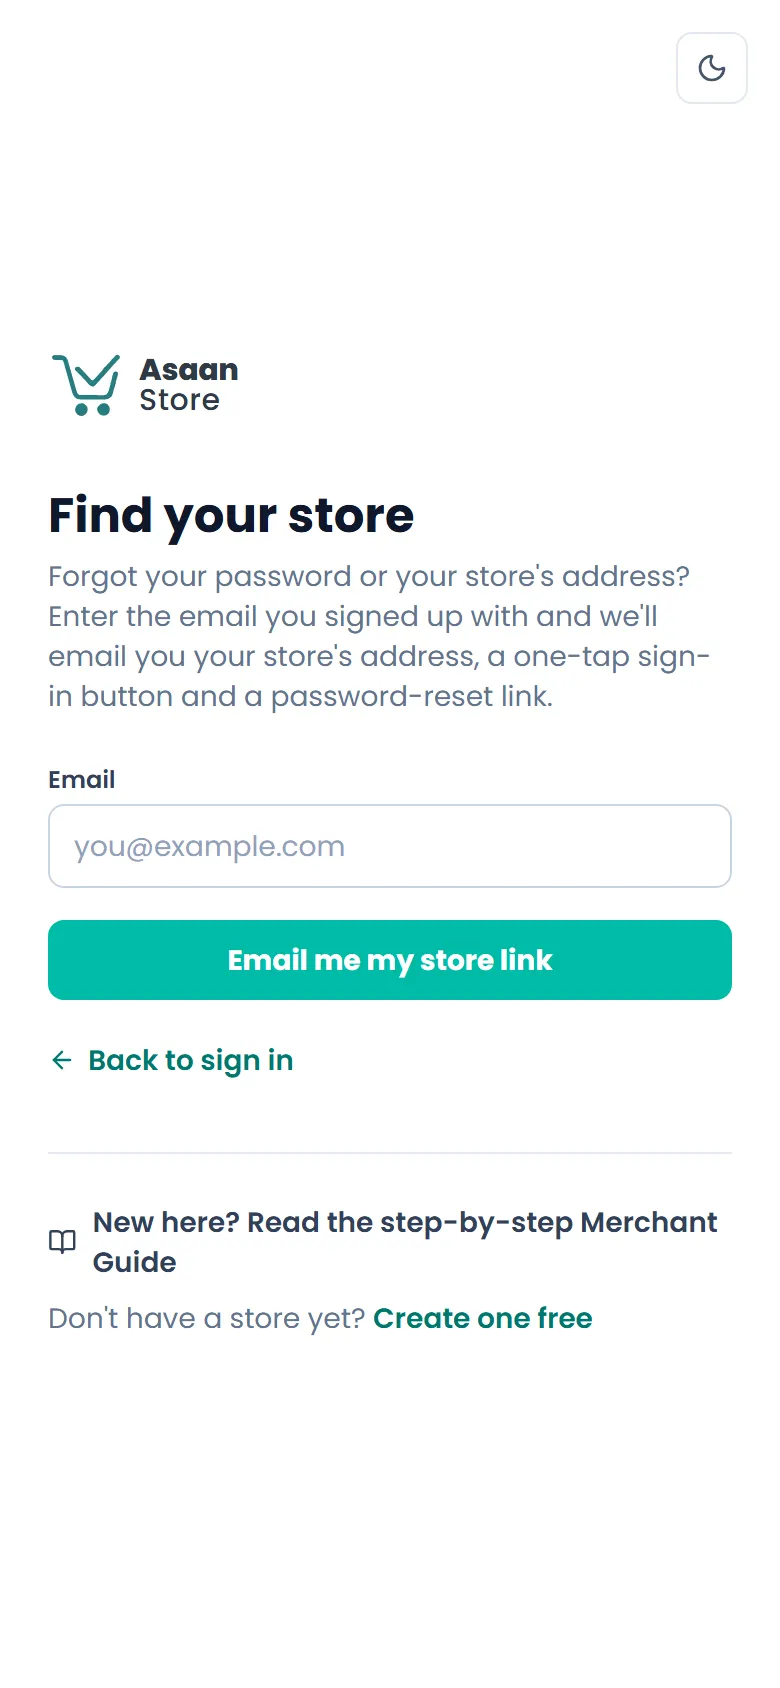
- 1Go to asaanstore.com/login and tap Forgot password? or Find my store.
- 2Enter the email you signed up with and tap Email me my store link.
- 3Open the email. It has your store's address, an Open my dashboard button that signs you in (it works once, for 24 hours) and a Reset it here link to choose a new password.
Choose a new password
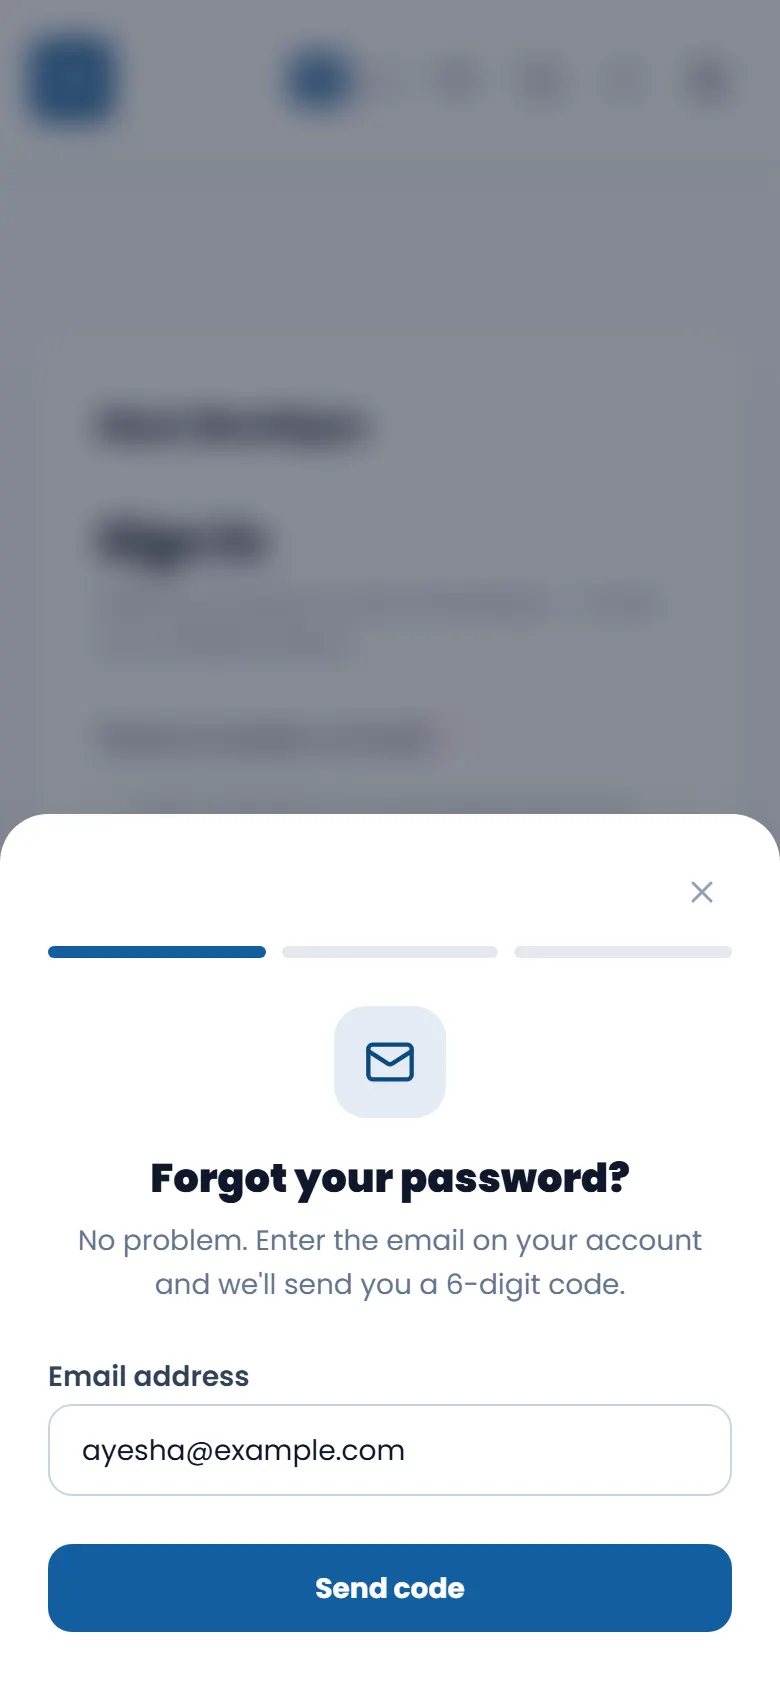
On your store's sign-in page (for example noorboutique.asaanstore.com/login) tap Forgot password? — it takes about a minute.
- 1Enter the email you sign in with and tap Send code.
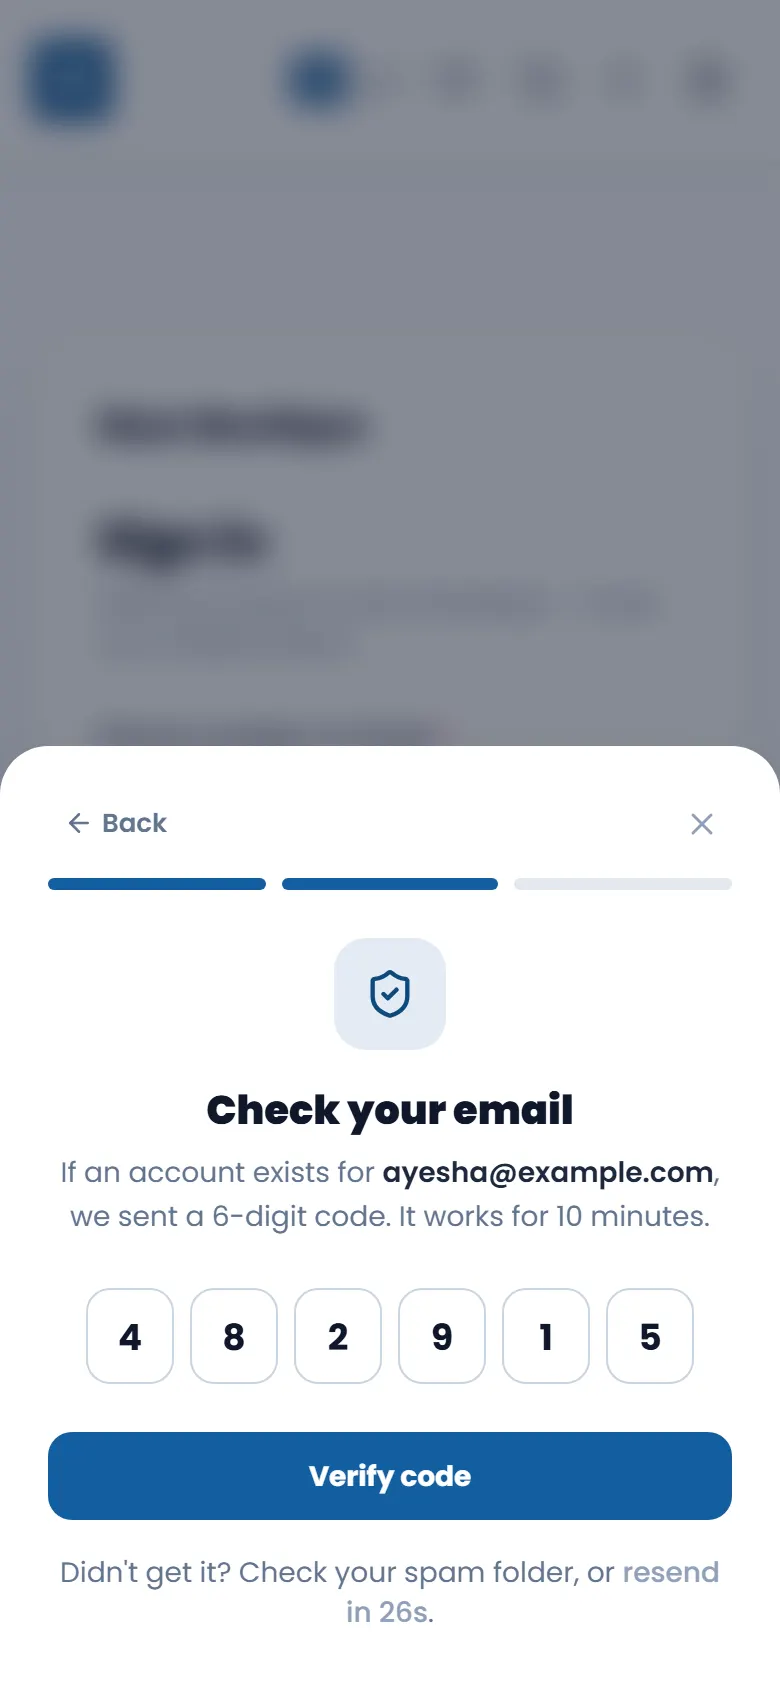
- 2Check your email for a 6-digit code and type it into the boxes — or paste it. It works for 10 minutes; if it has run out, tap send a new code.
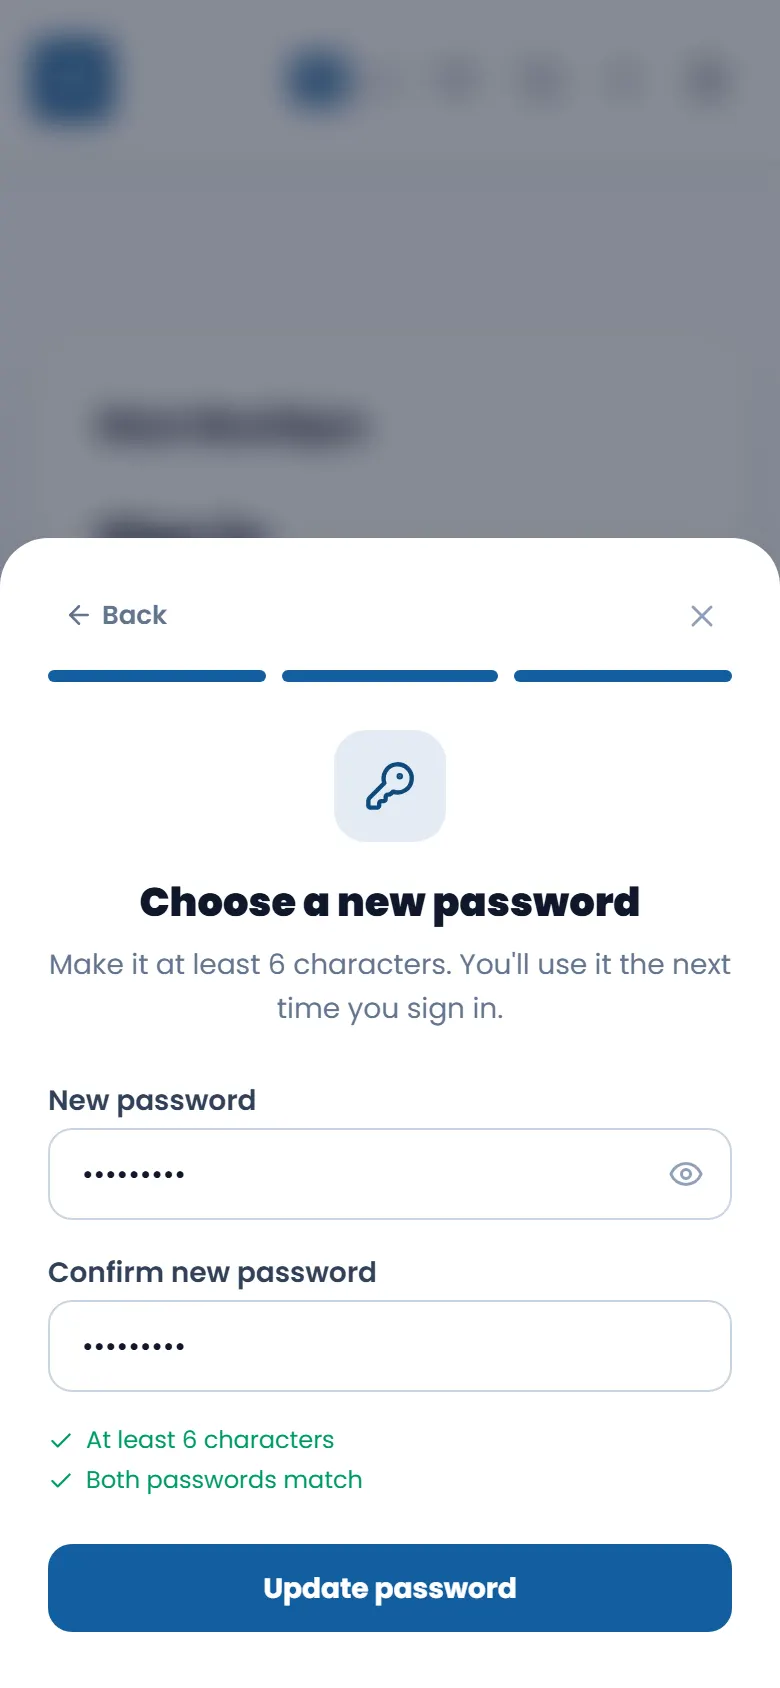
- 3Type your new password twice (at least 6 characters) and tap Update password. The ticks turn green when it's ready.
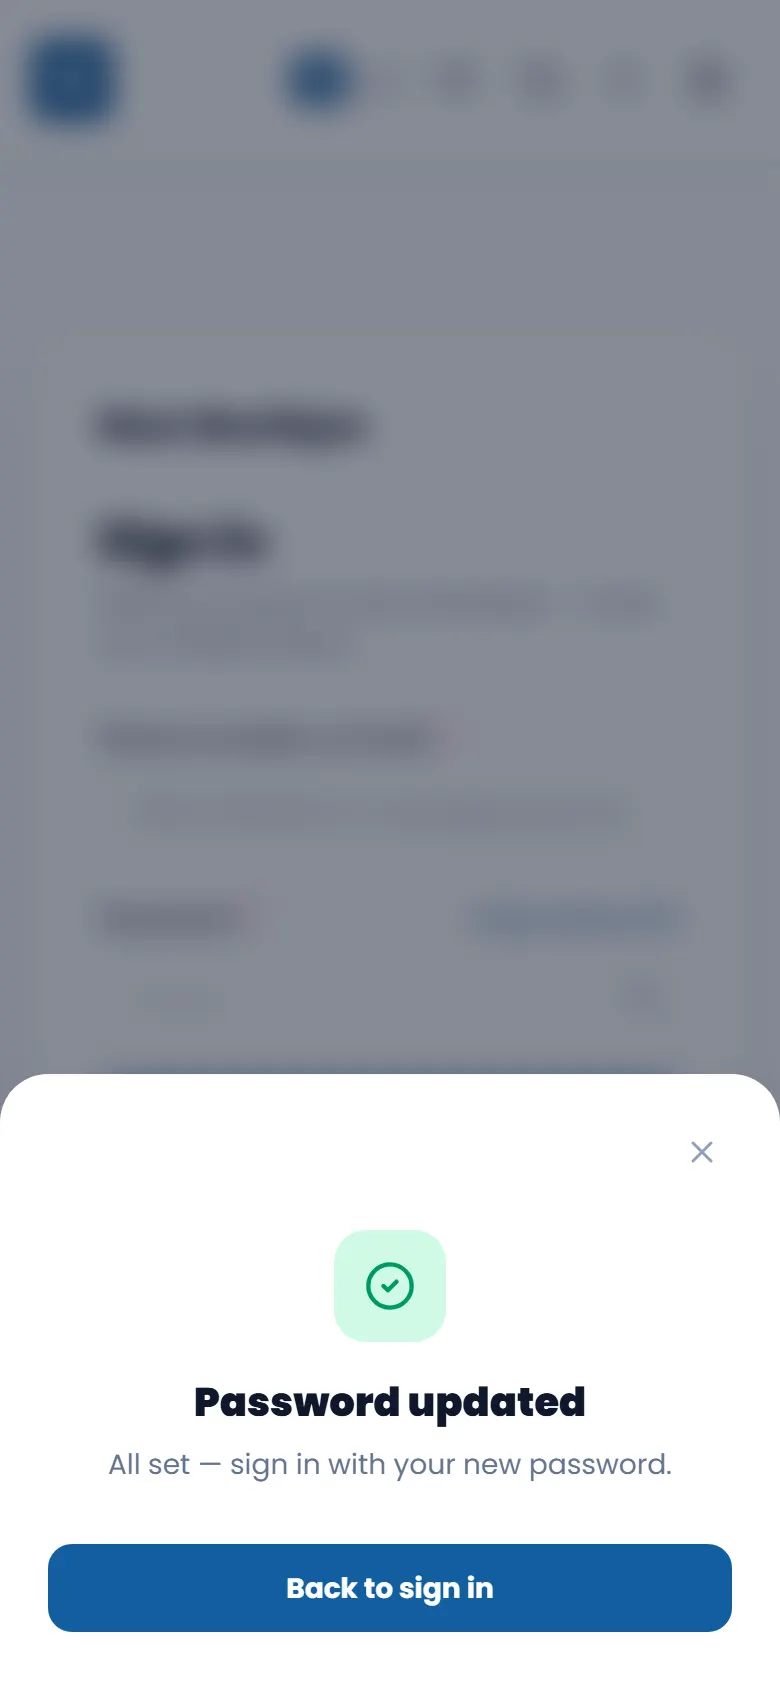
- 4Tap Back to sign in — your email is already filled in. Sign in with your new password.
See your website the way customers do
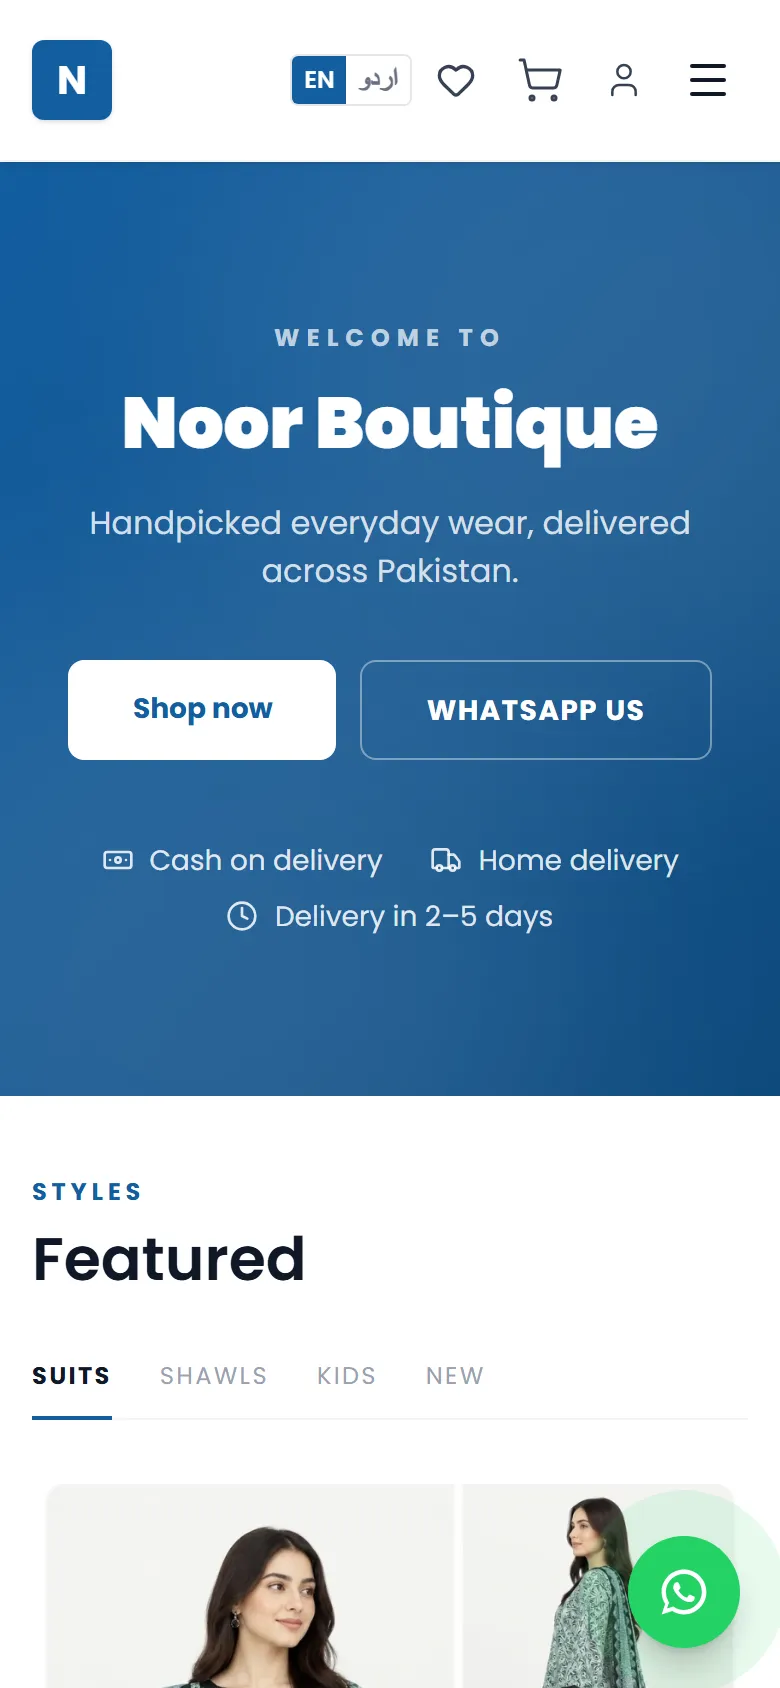
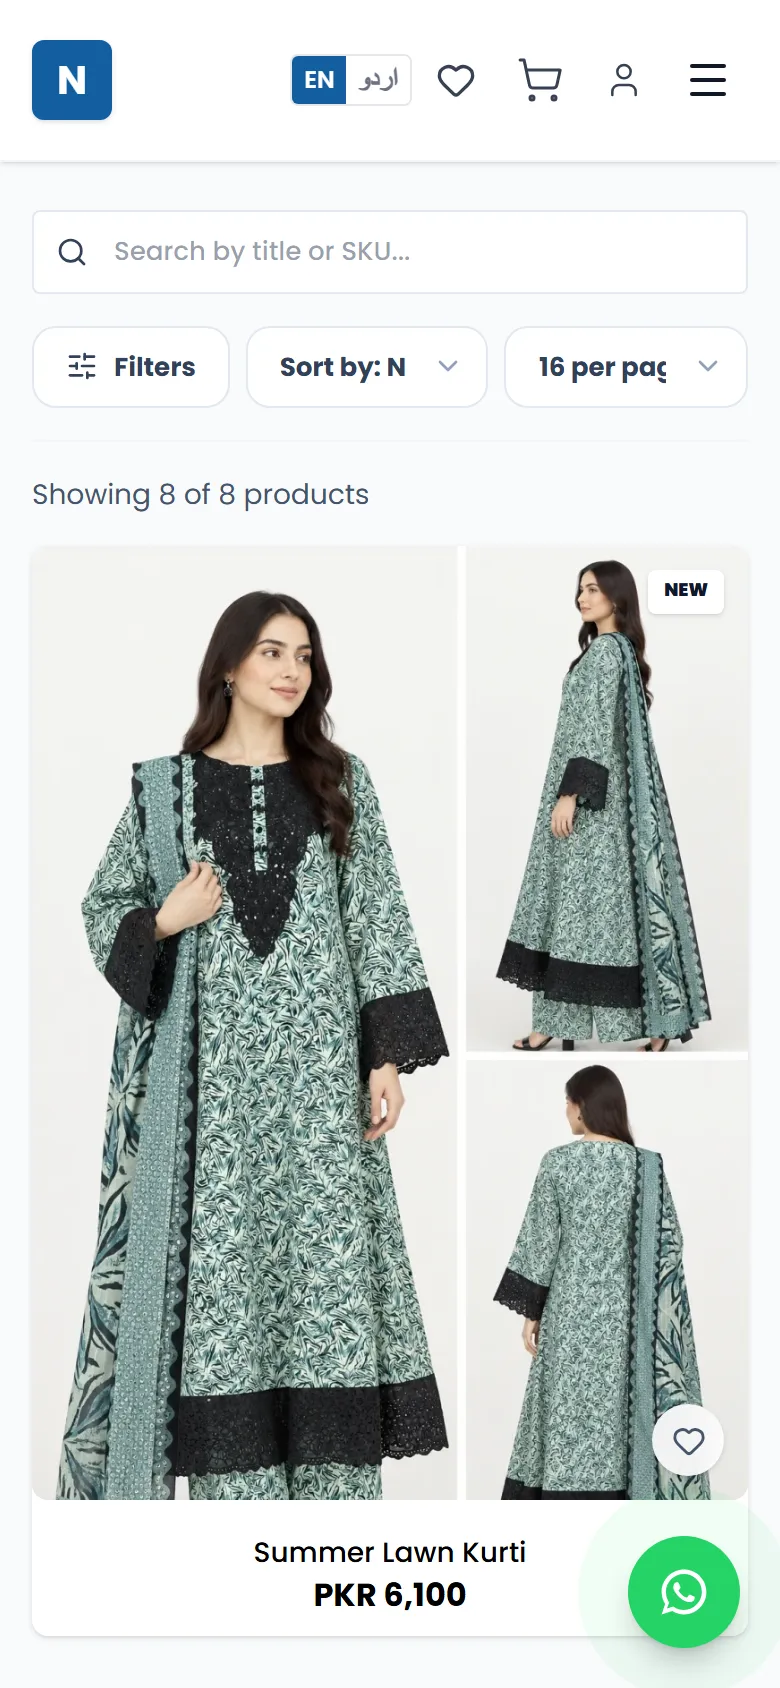
Your store is a real website your customers can visit and order from — no app needed.
- 1In your dashboard, tap View store at the top (on a phone it's the small button next to your initial). It opens your website in a new tab.
- 2Or simply type your store's address into any browser — for example noorboutique.asaanstore.com.
- 3Share that address with customers on WhatsApp, Instagram and Facebook. That's your shop!
Set up your store
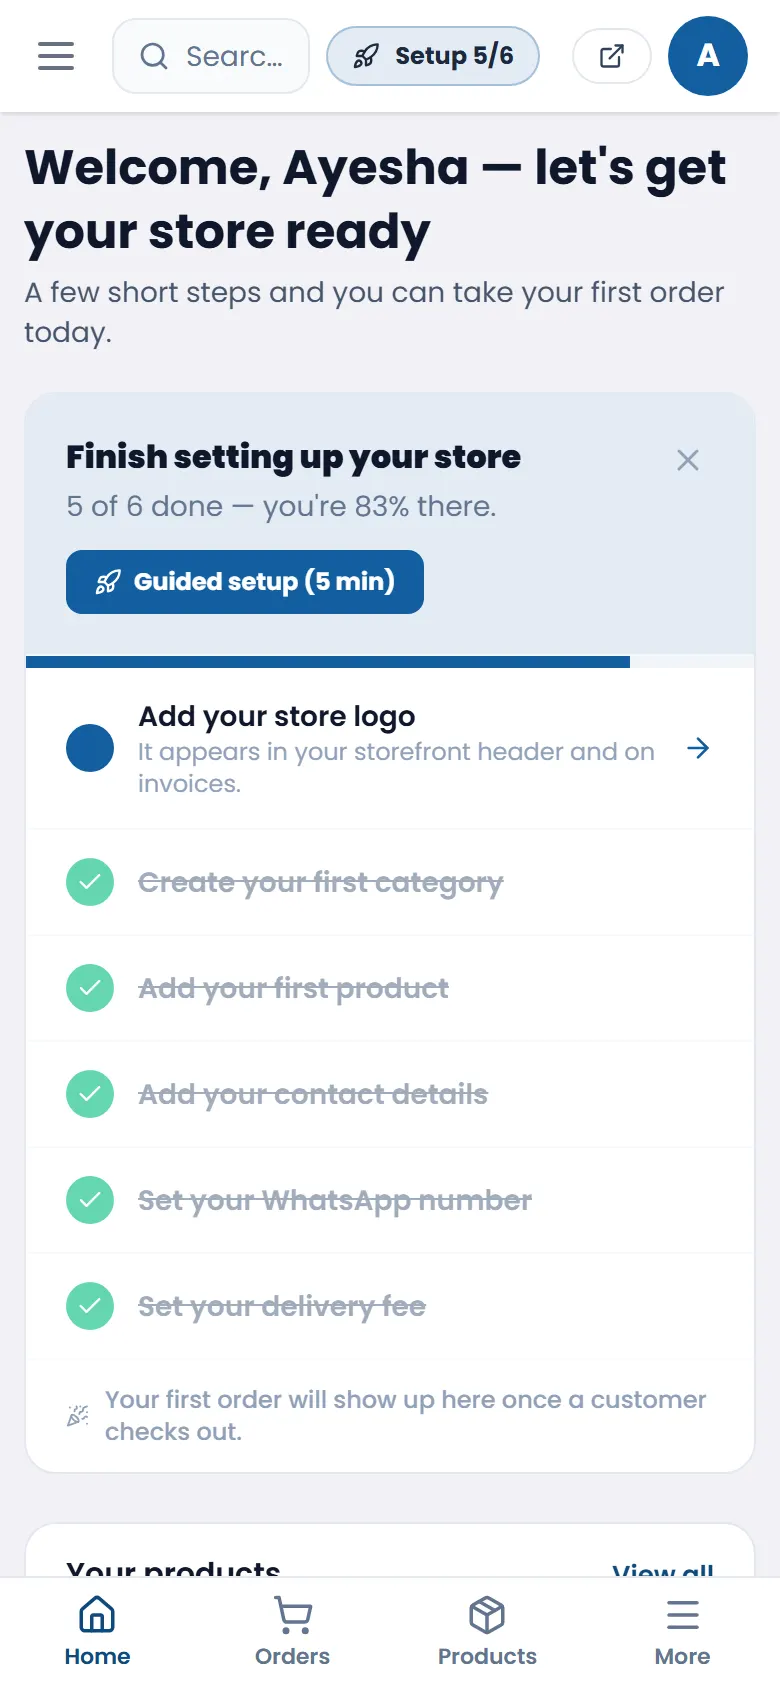
Your dashboard's Home shows a Finish setting up your store checklist with exactly what's left — tap any item to go straight there, or tap Guided setup to do it step by step. The menu has a few sections: Home, Orders, Products, Online Store (your theme and pages) and Settings. On a phone, Home, Orders and Products sit in the bar at the bottom — tap More (or the ☰ menu at the top-left) for everything else. The first time you sign in, a short tour shows you around.
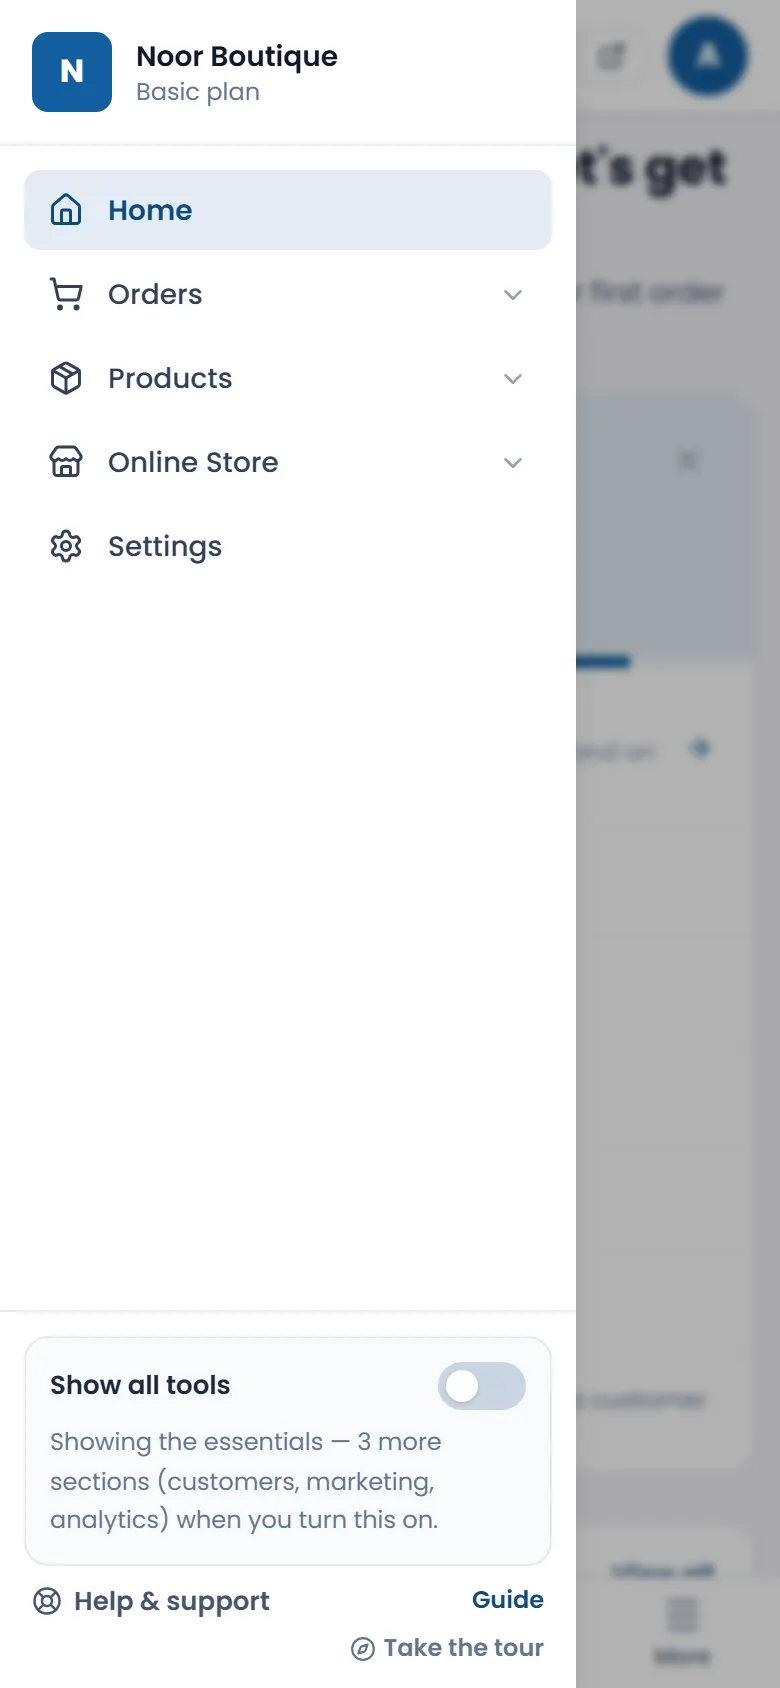
- 1Tap the ☰ menu or More in the bottom bar (on a computer the menu is always on the left).
- 2Your setup checklist — tap Guided setup or any step.
- 3Online Store opens your Themes and Pages (home page, contact page and more).
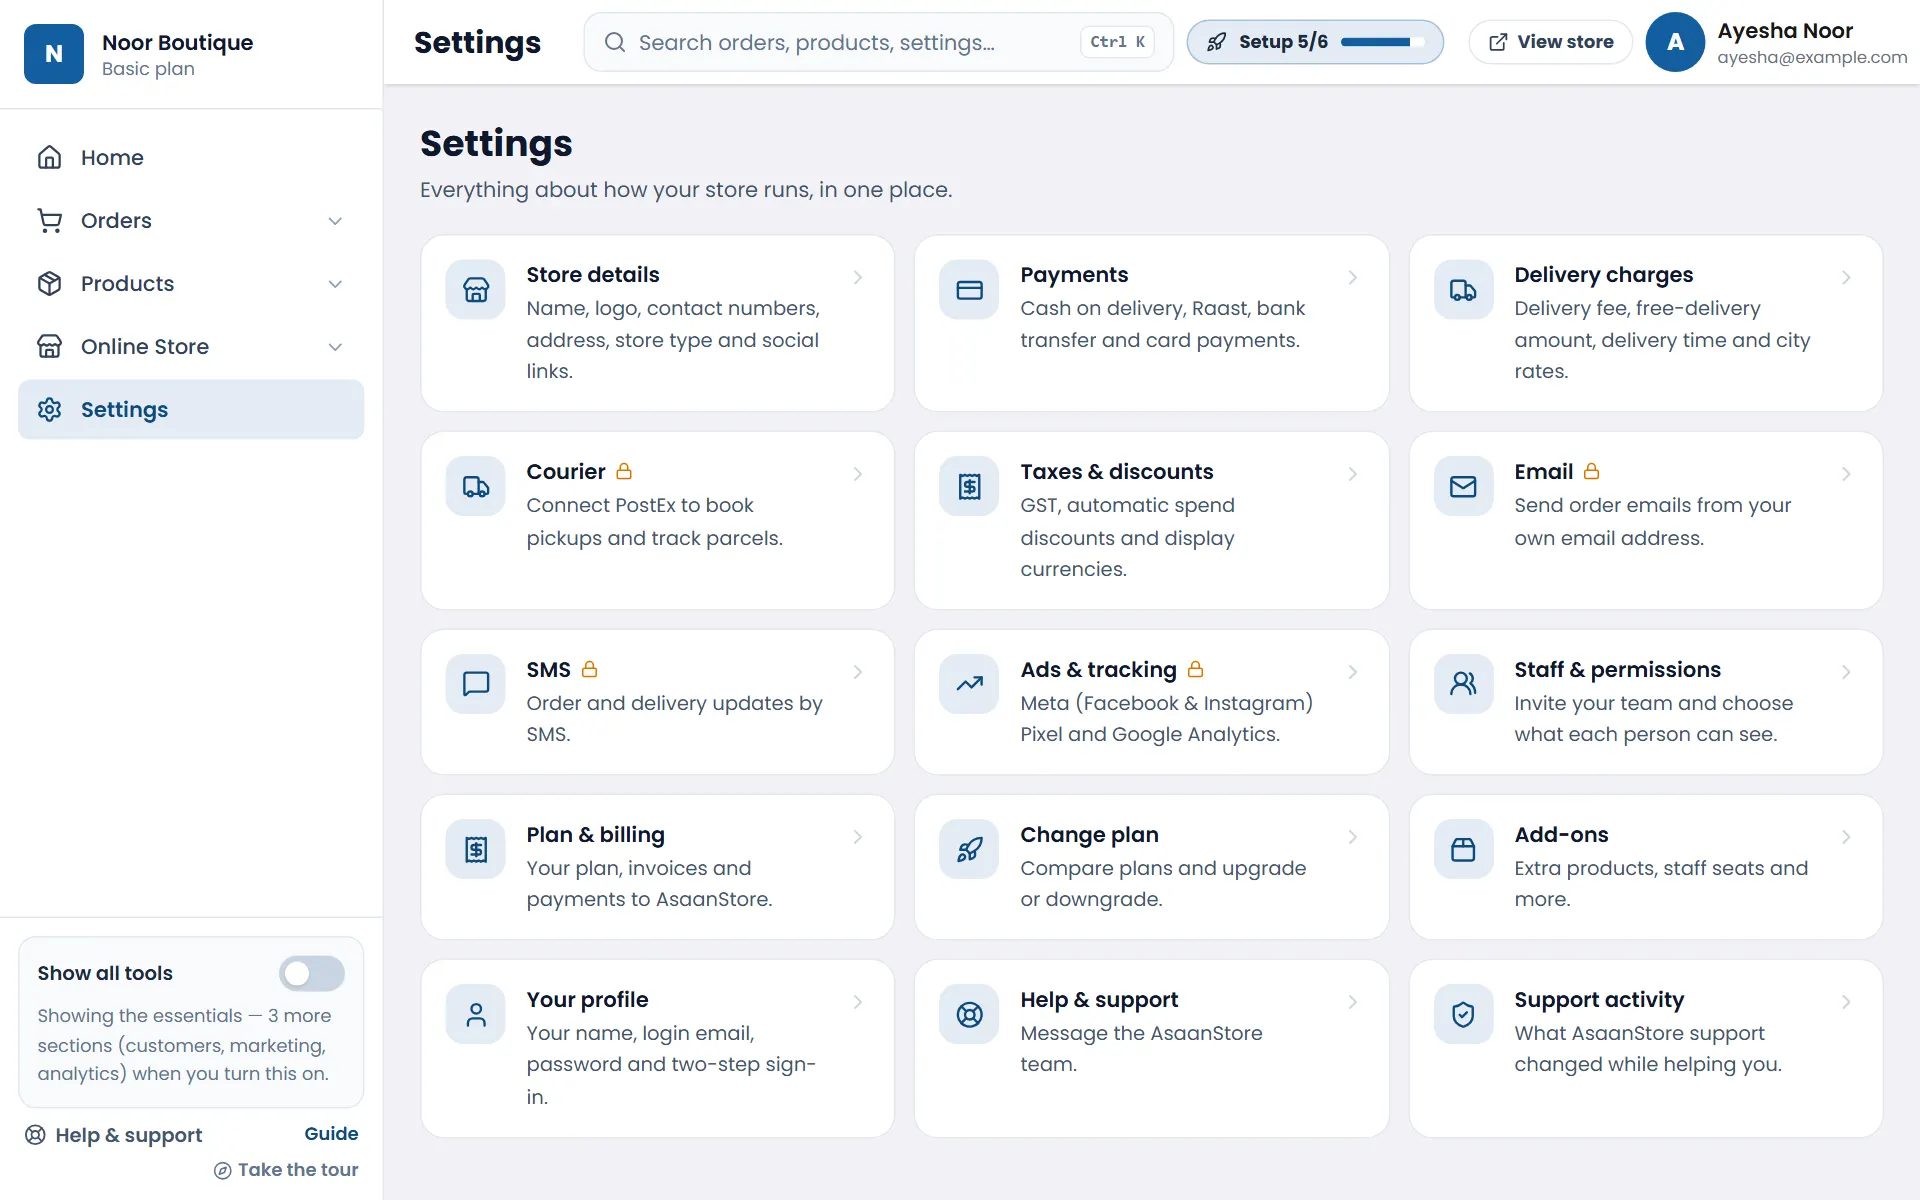
- 4Settings has everything about how your store runs: store details, payments, delivery, staff and billing.
- 5New stores see just these essentials. Turn on Show all tools to see Customers, Marketing and Analytics too. Below it are Help & support, the Guide and Take the tour.
Logo, WhatsApp & contact details
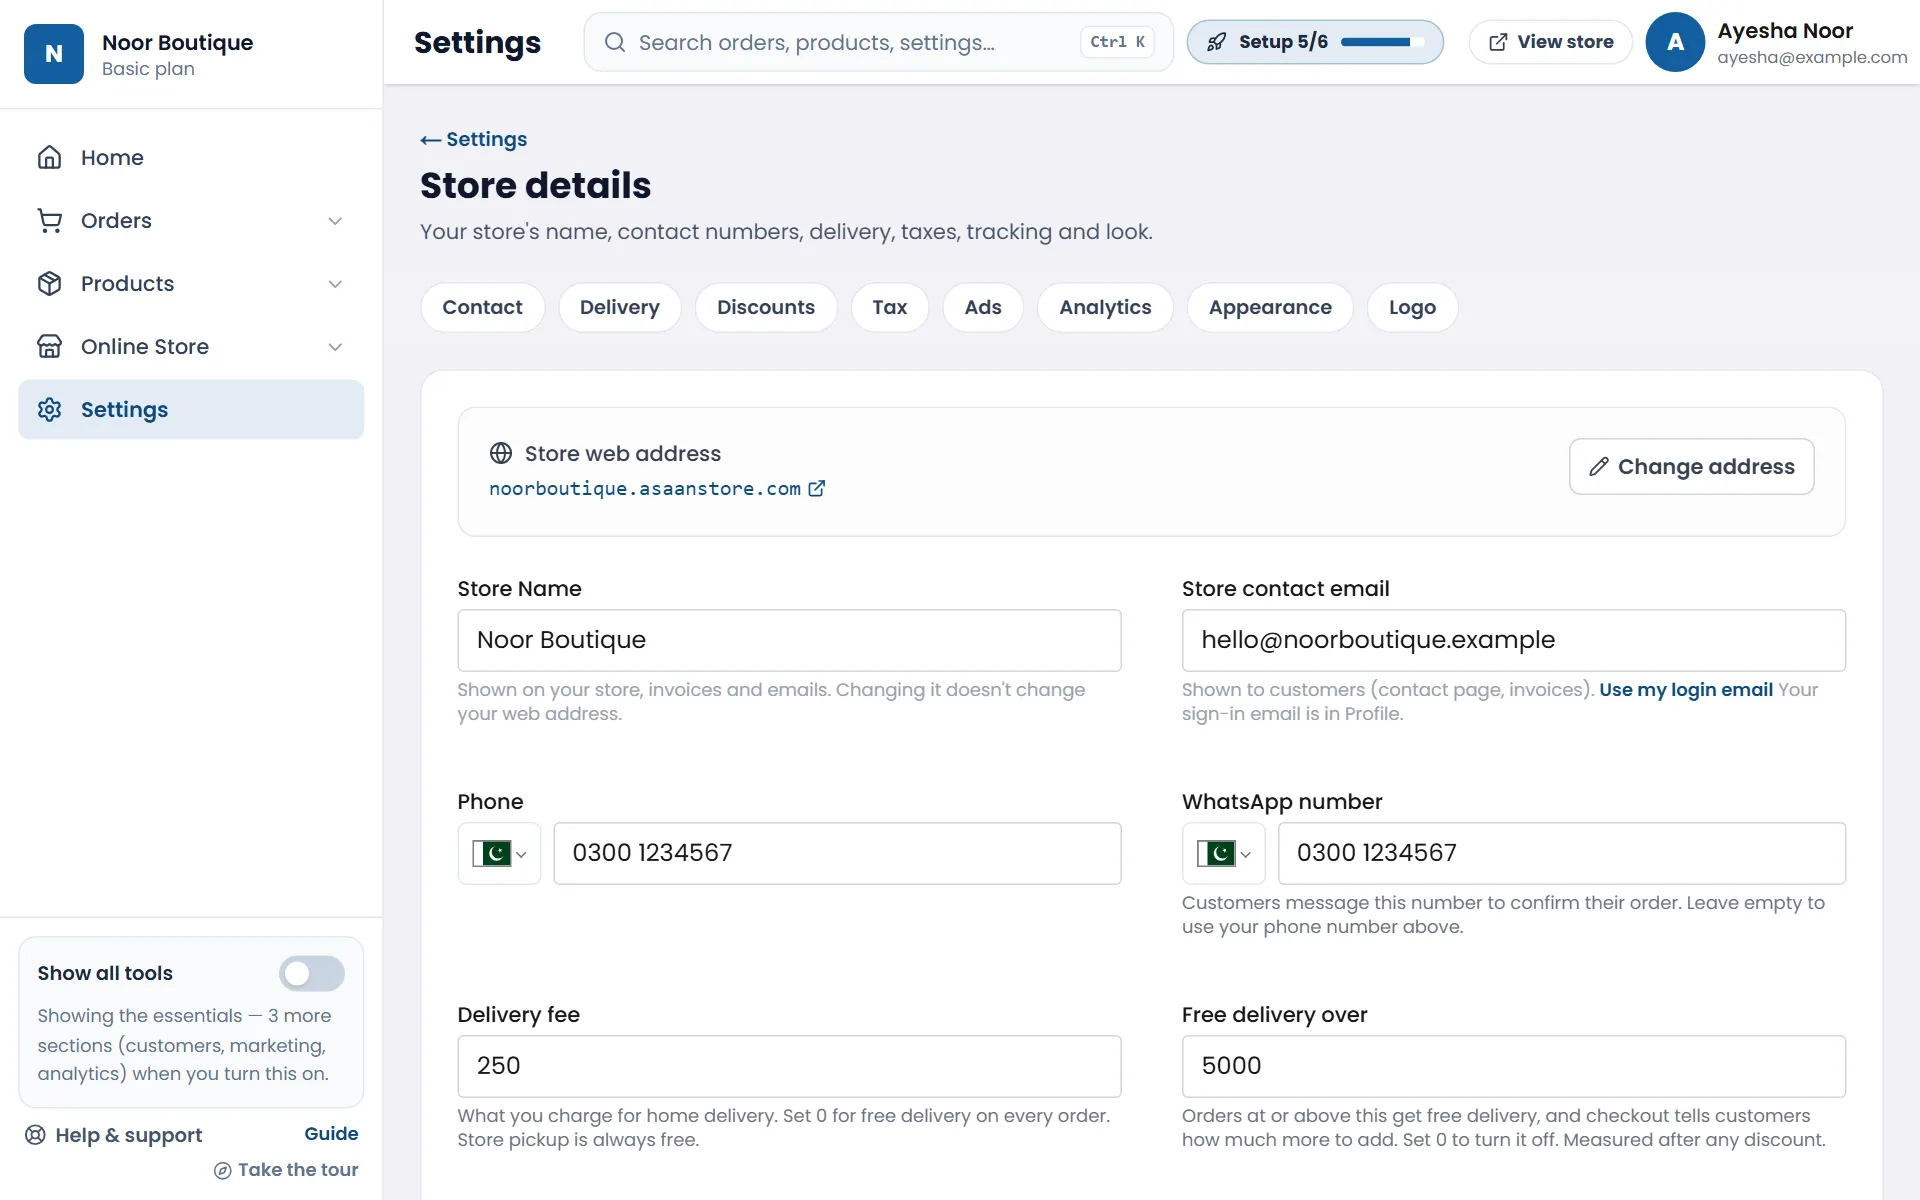
- 1Open Settings from the menu and tap Store details.
- 2Check your store name, and add the contact email and phone customers should use.
- 3Add your WhatsApp number — customers message it to confirm orders, and it shows as a WhatsApp button on your website.
- 4Set your delivery fee, your free delivery over amount and your delivery time.
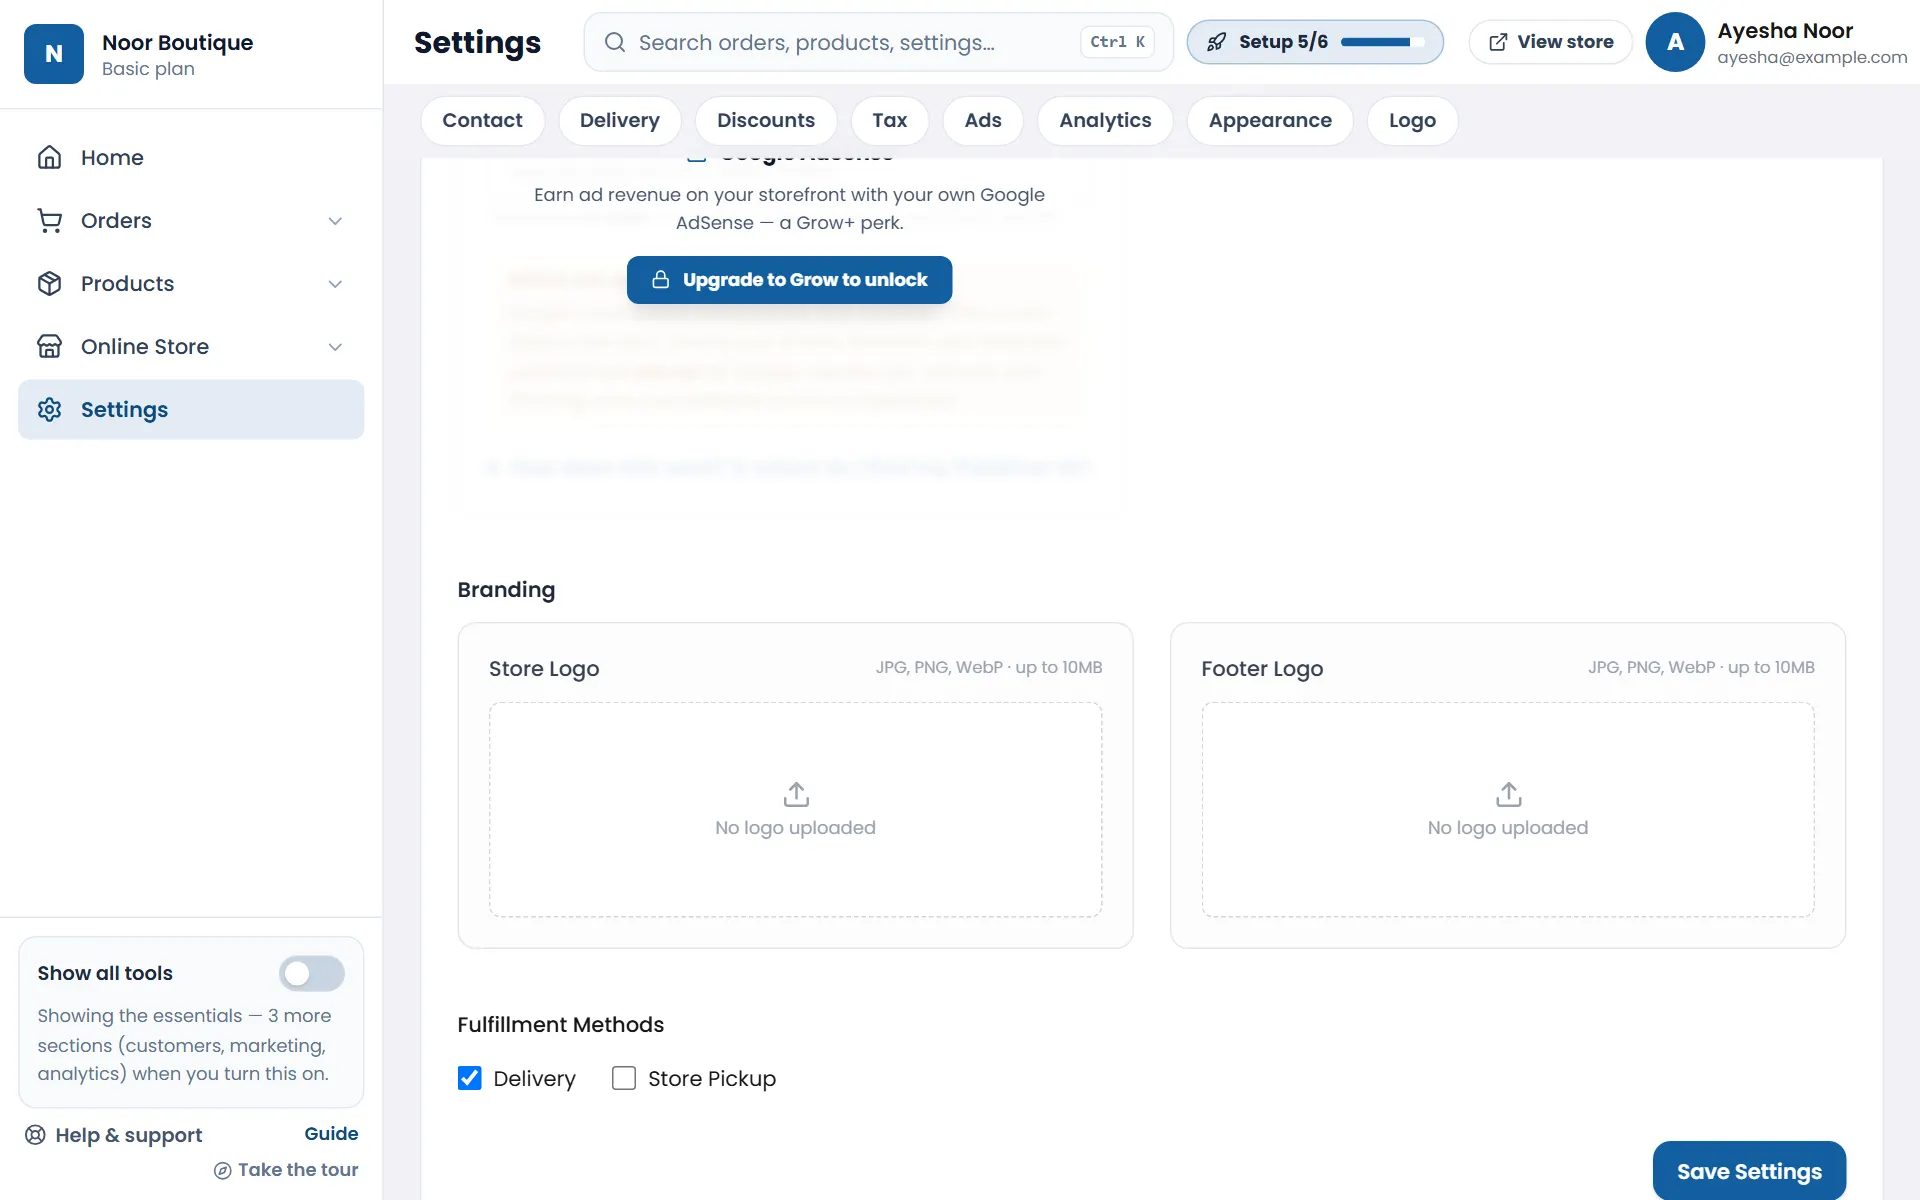
- 5Tap Logo in the row of buttons at the top (they jump to each part of the page) and upload your Store Logo (JPG, PNG or WebP).
- 6As soon as you change something, a bar appears at the bottom of the screen — tap Save Settings, or Discard to undo. If you try to leave with unsaved changes, we warn you first.
Choose a theme
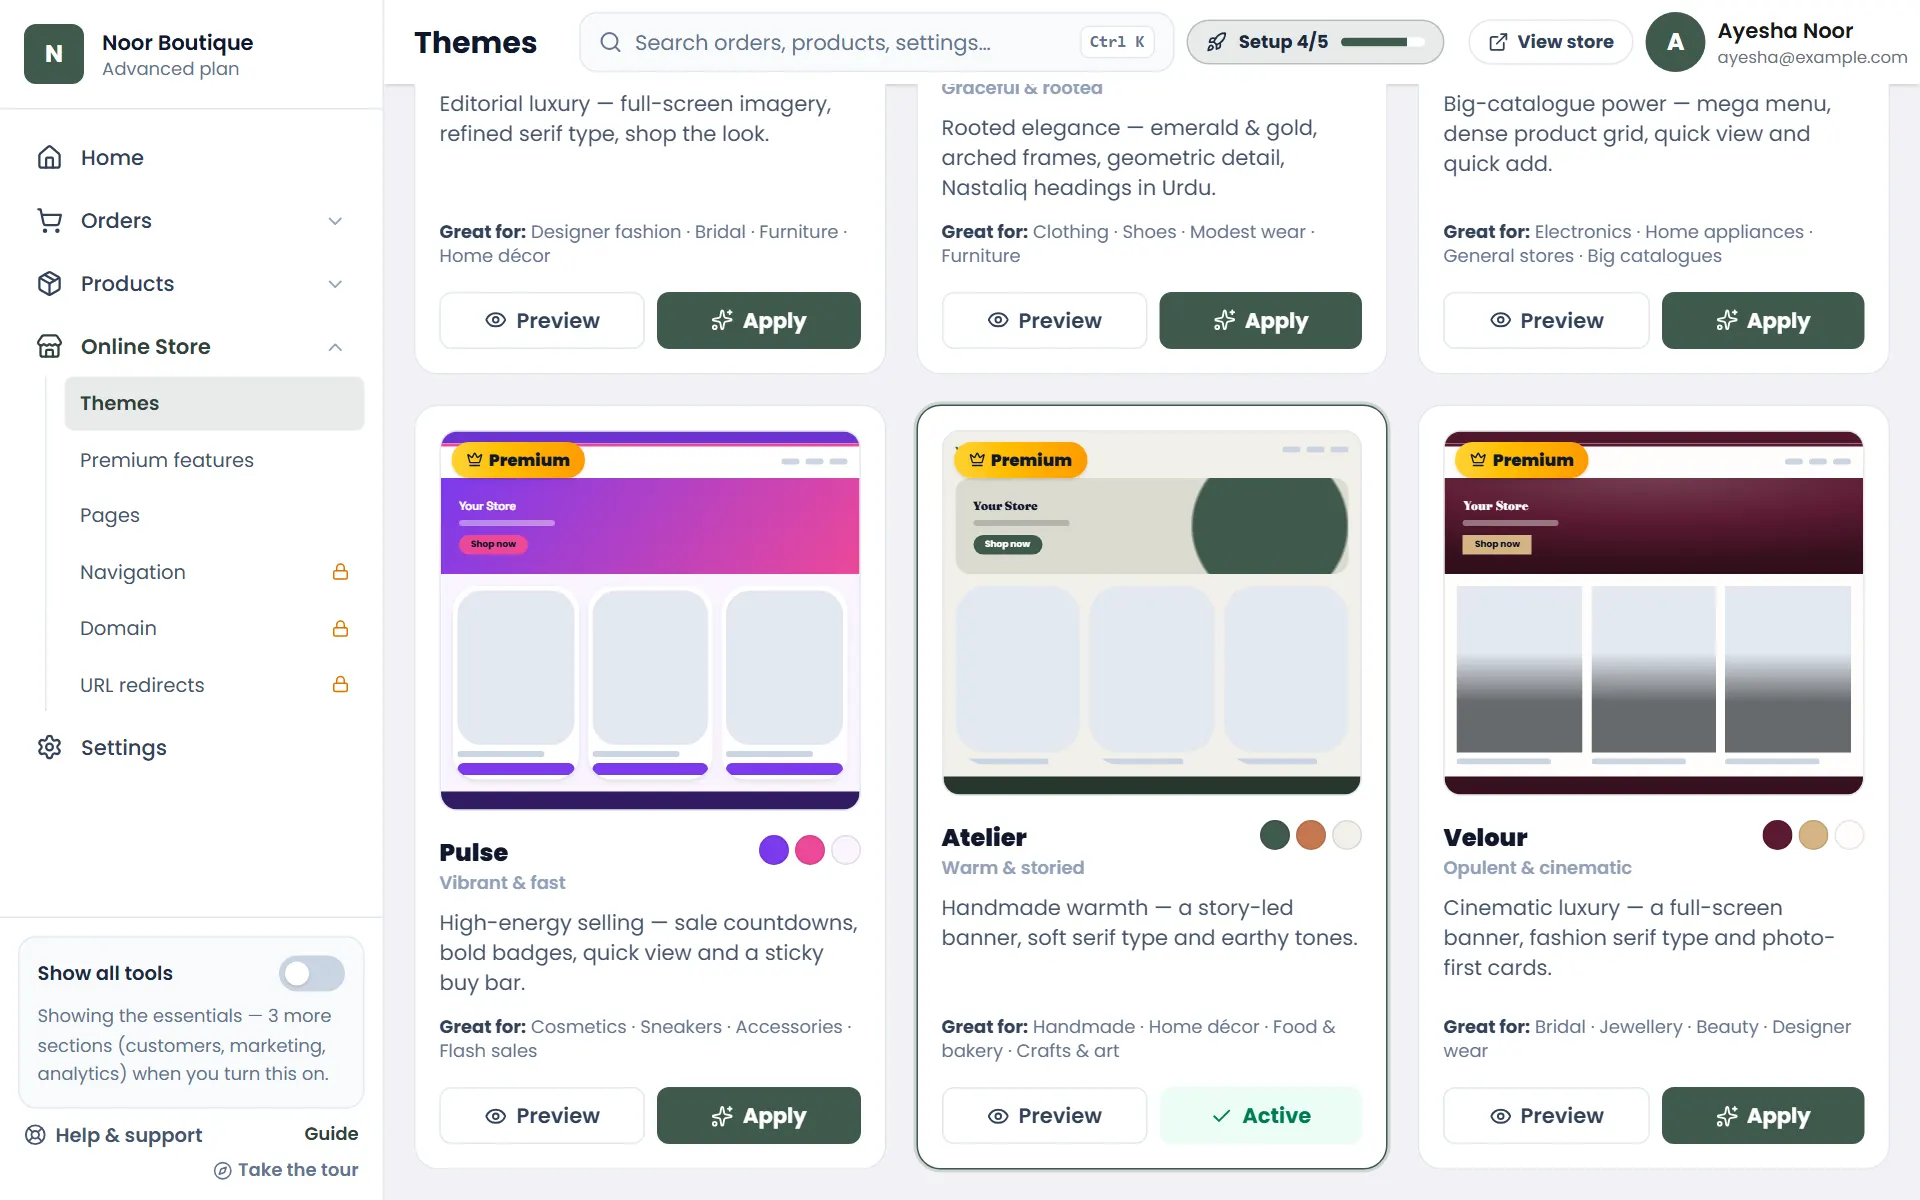
There are 12 themes — 6 standard and 6 premium (marked with a crown). Each is a complete look: colours, fonts, banner, product cards and page layout. Every theme suits any kind of store; the Great for line is just a hint.
- 1Open Online Store → Themes from the menu.
- 2Tap Preview on any theme to see your own store in that look — nothing changes yet. You can preview every theme, even ones your plan doesn't include.
- 3Like it? Tap Apply. You can switch back any time; your products and pages stay the same.
| Plan | Themes you can apply |
|---|---|
| Starter | Classic, Fresh |
| Basic | + Soft, Coast |
| Grow | + Bold, and the premium Mega, Pulse & Atelier |
| Advanced | All 12 — adds Luxe and the premium Maison, Noor & Velour |
Your home page
Your home page already works — it fills itself from your products. Change only what you want.
- 1Open Online Store → Pages and tap Home Page.
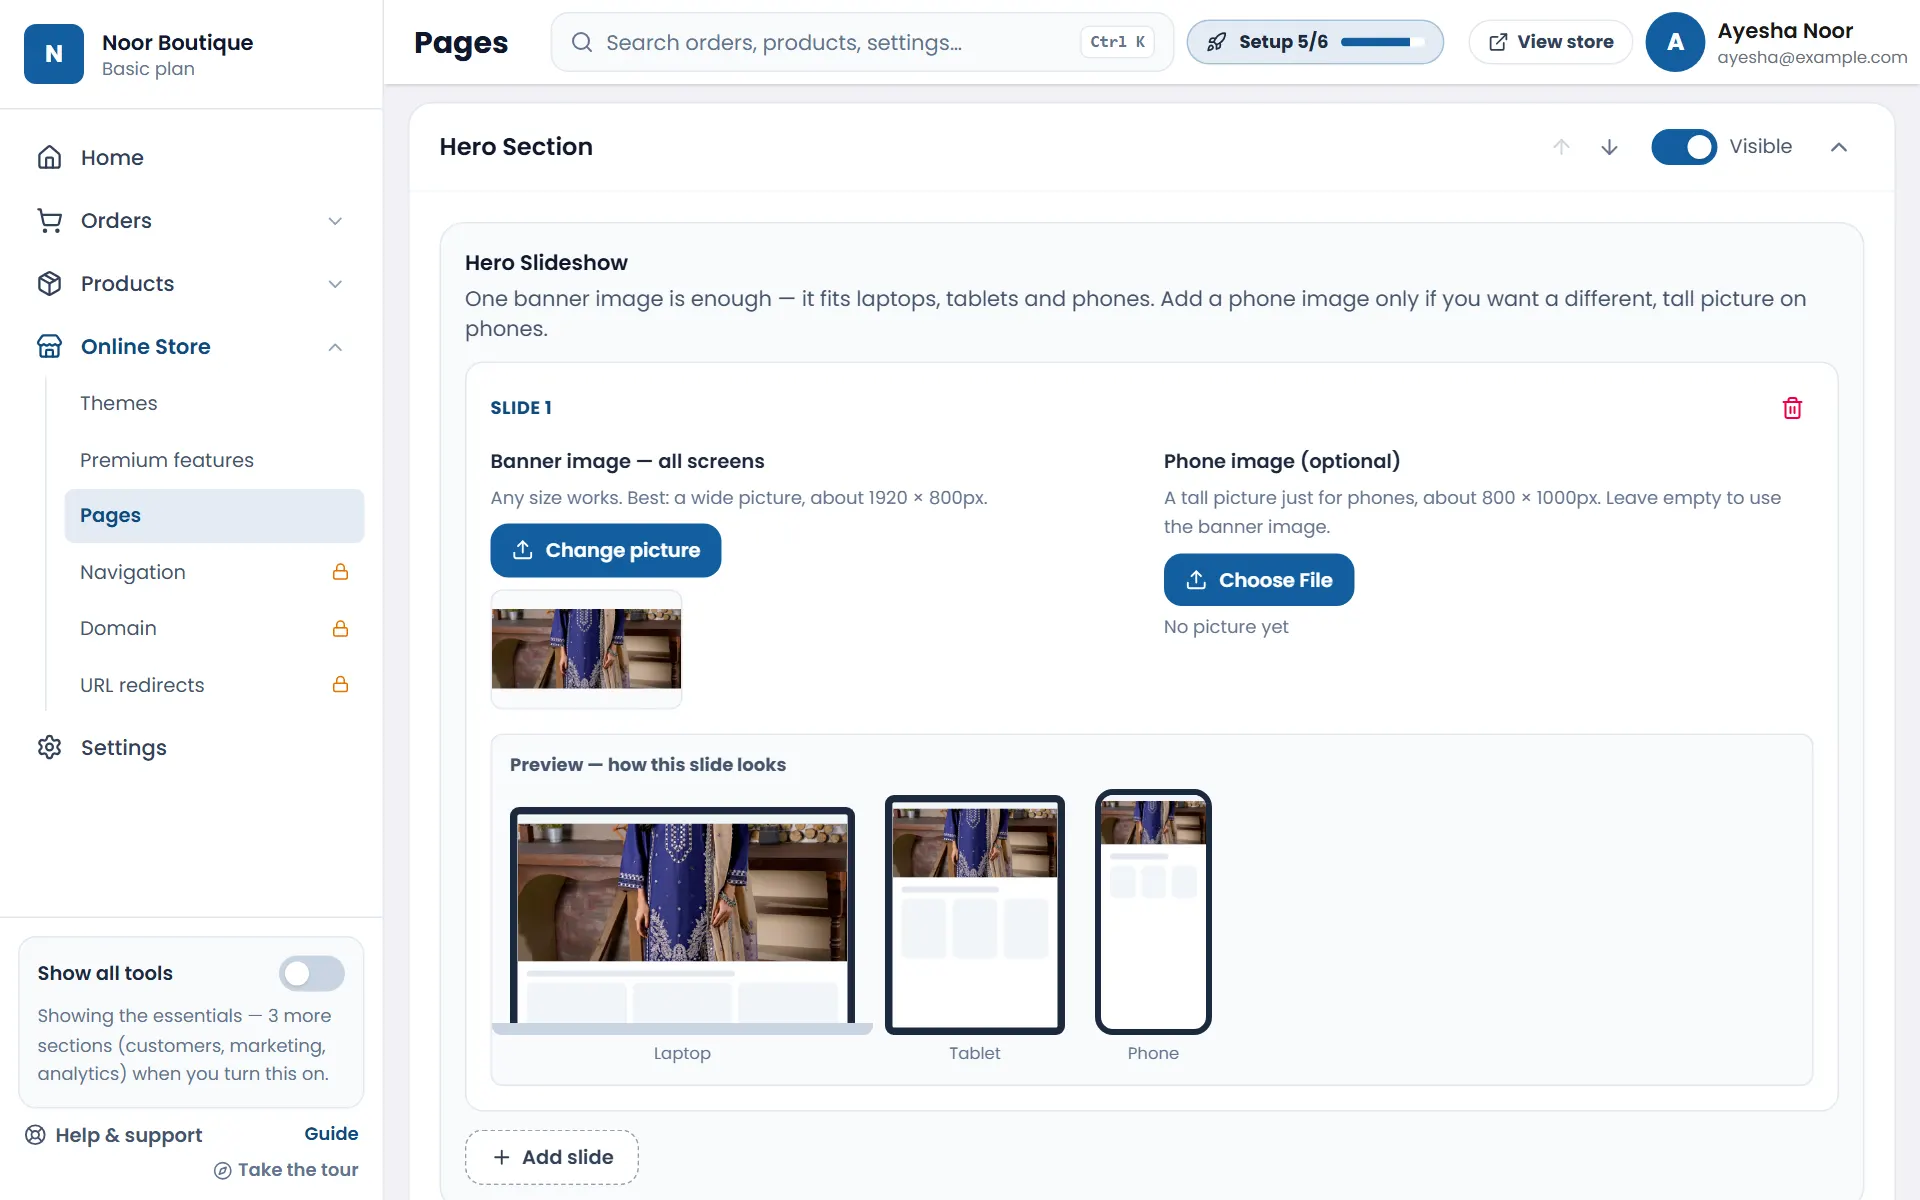
- 2Tap a section's name to open it. In Hero Section, tap Add slide and choose your Banner image. One wide picture is enough — it shows on computers, tablets and phones. (A separate tall Phone image is optional.)
- 3Check the Preview under the slide — it shows exactly how your banner looks on a laptop, a tablet and a phone.
- 4Use the arrows to change the order of sections and the Visible switch to hide one. Open Featured Products to pick which categories to show.
- 5A bar appears at the bottom once you change something — tap Save all changes (or Discard to put everything back).
Categories & products
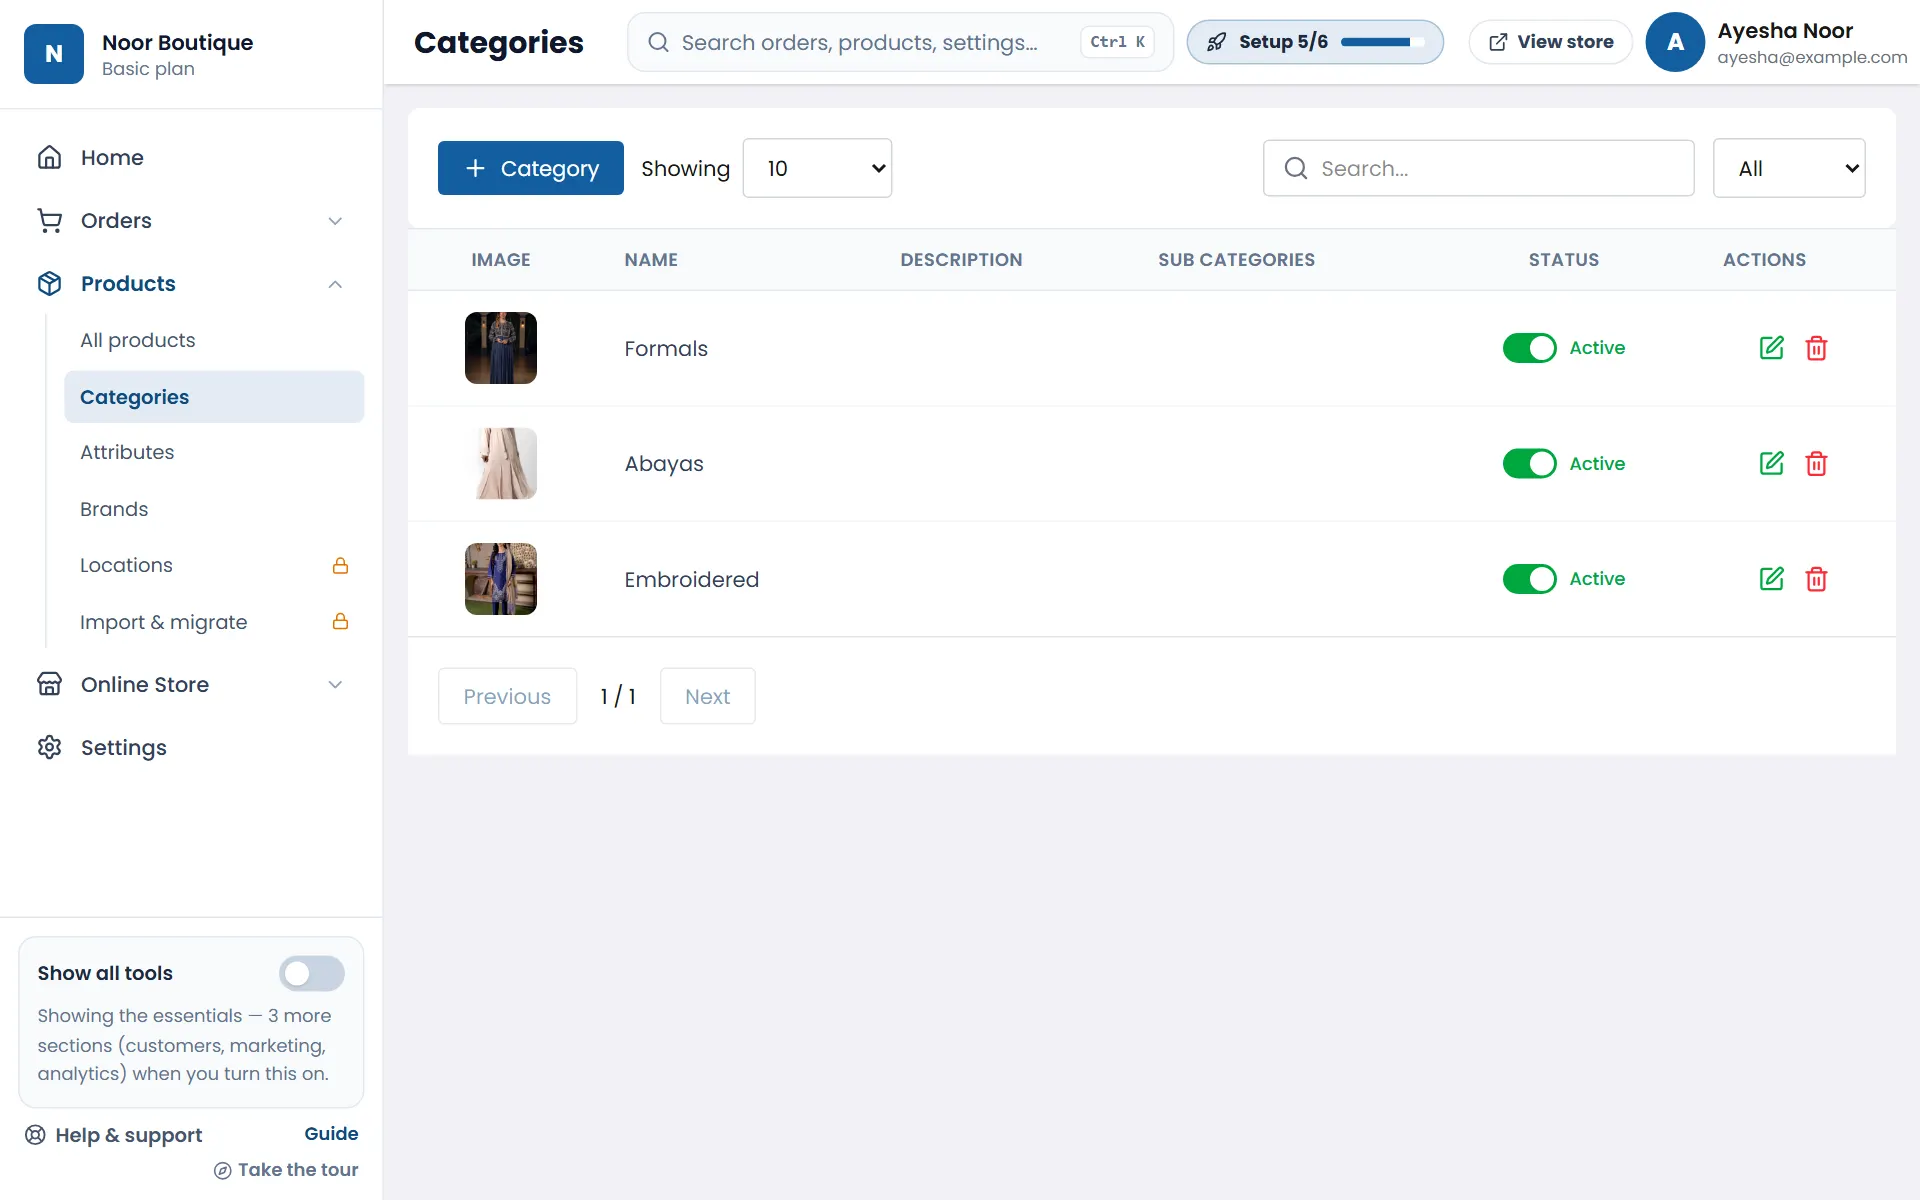
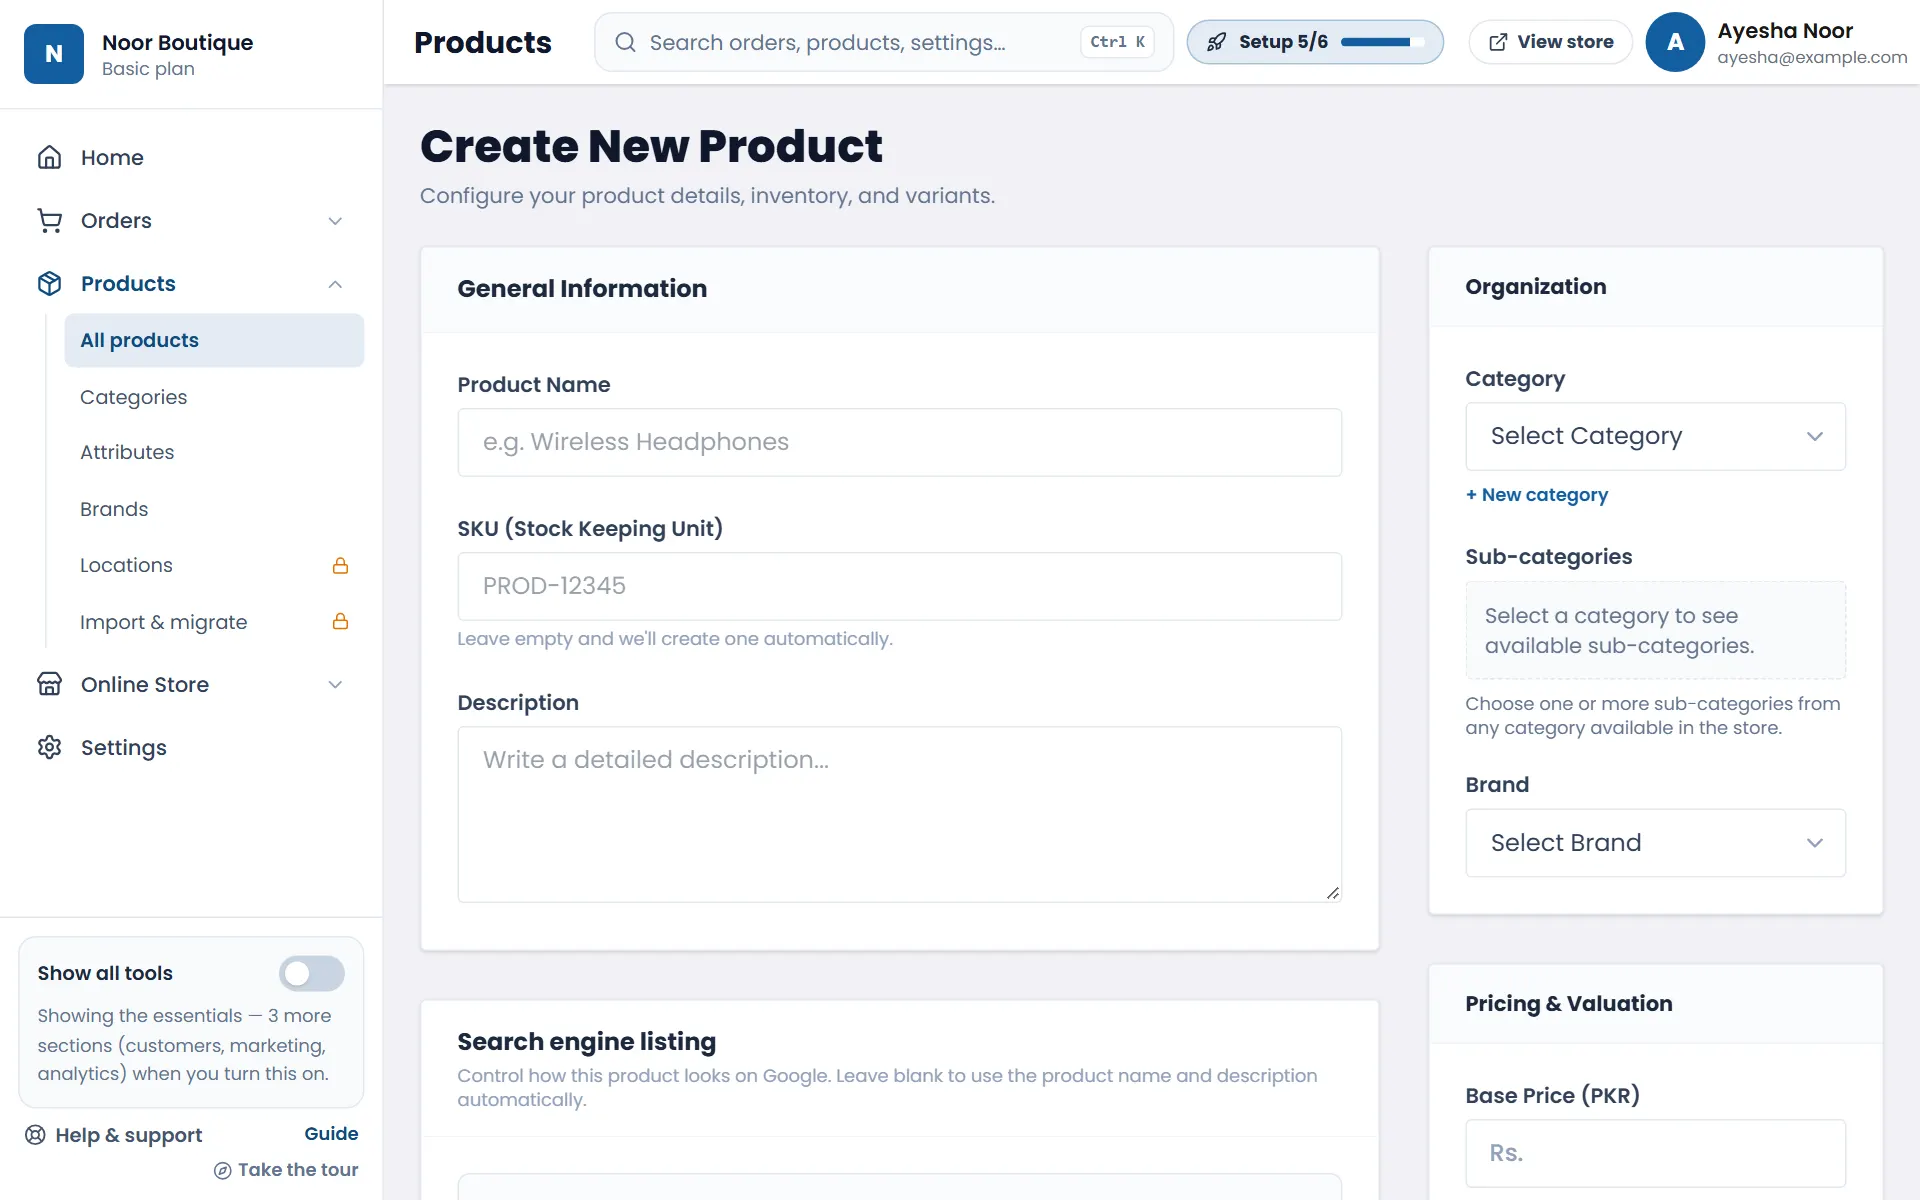
- 1Open Products → Categories and tap + Category — for example “Suits”, “Shawls”, “Kids”. Add a picture for each.
- 2Open Products → All products and tap + Product.
- 3Enter the product name and a short description.
- 4Choose its category (or tap + New category right there).
- 5Add the price, upload clear photos, set how many you have in stock, and tap Save Changes at the bottom.
Your contact page
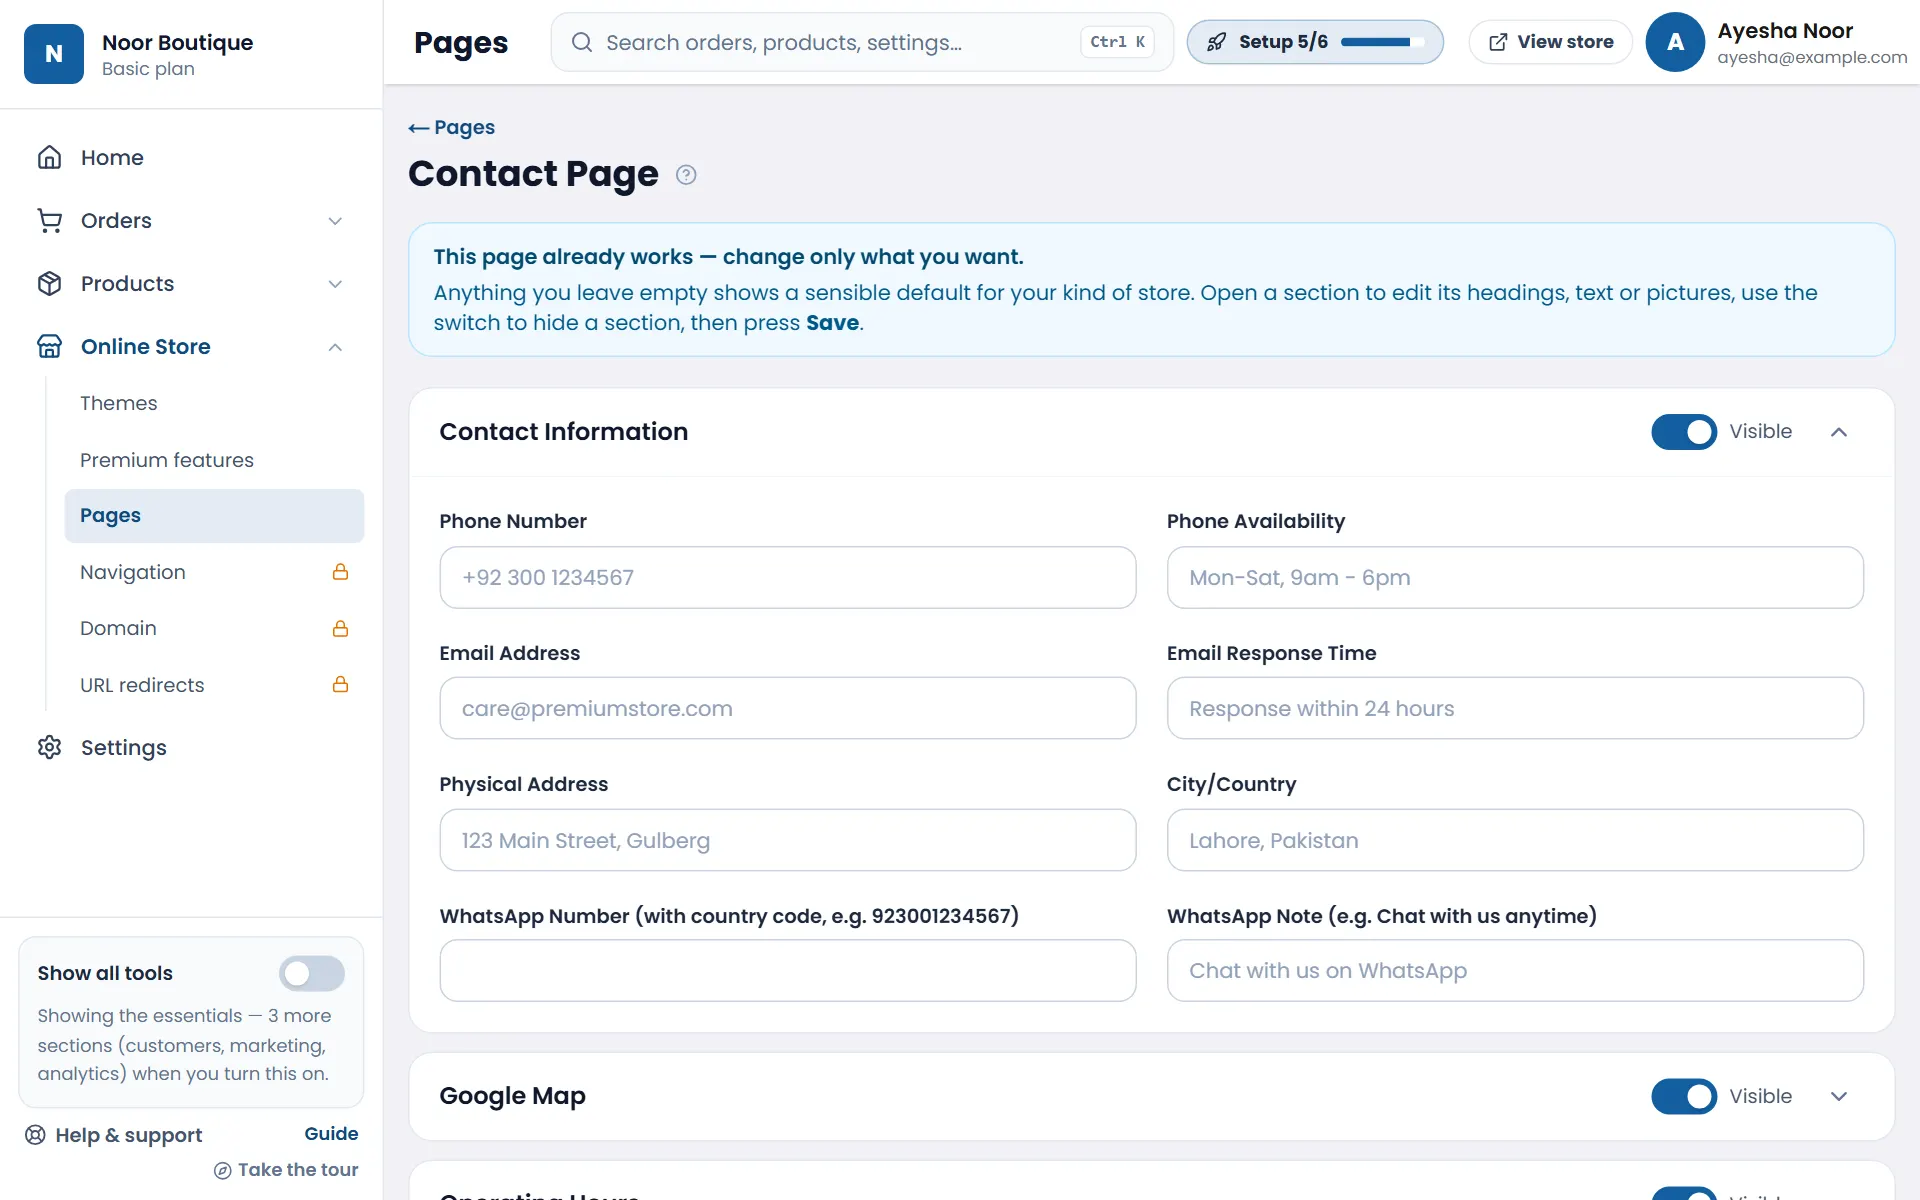
- 1Open Online Store → Pages and tap Contact Page.
- 2Fill in your phone, email, address and WhatsApp number — anything you leave empty simply isn't shown.
- 3Optionally add your Google Map and operating hours, then tap Save all changes.
Get your first order
Your store is ready — now bring customers to it.
- 1Share your store's address in your WhatsApp status, groups and broadcast lists.
- 2Put it in your Instagram and Facebook bio, and in your posts.
- 3When a customer orders, a New order message pops up on your dashboard and Home shows it under Needs your attention — tap Review orders, confirm it with them on WhatsApp and send it out (see Handle your orders).
Handle your orders
Everything about an order is in Orders — from confirming it's real to marking it delivered.
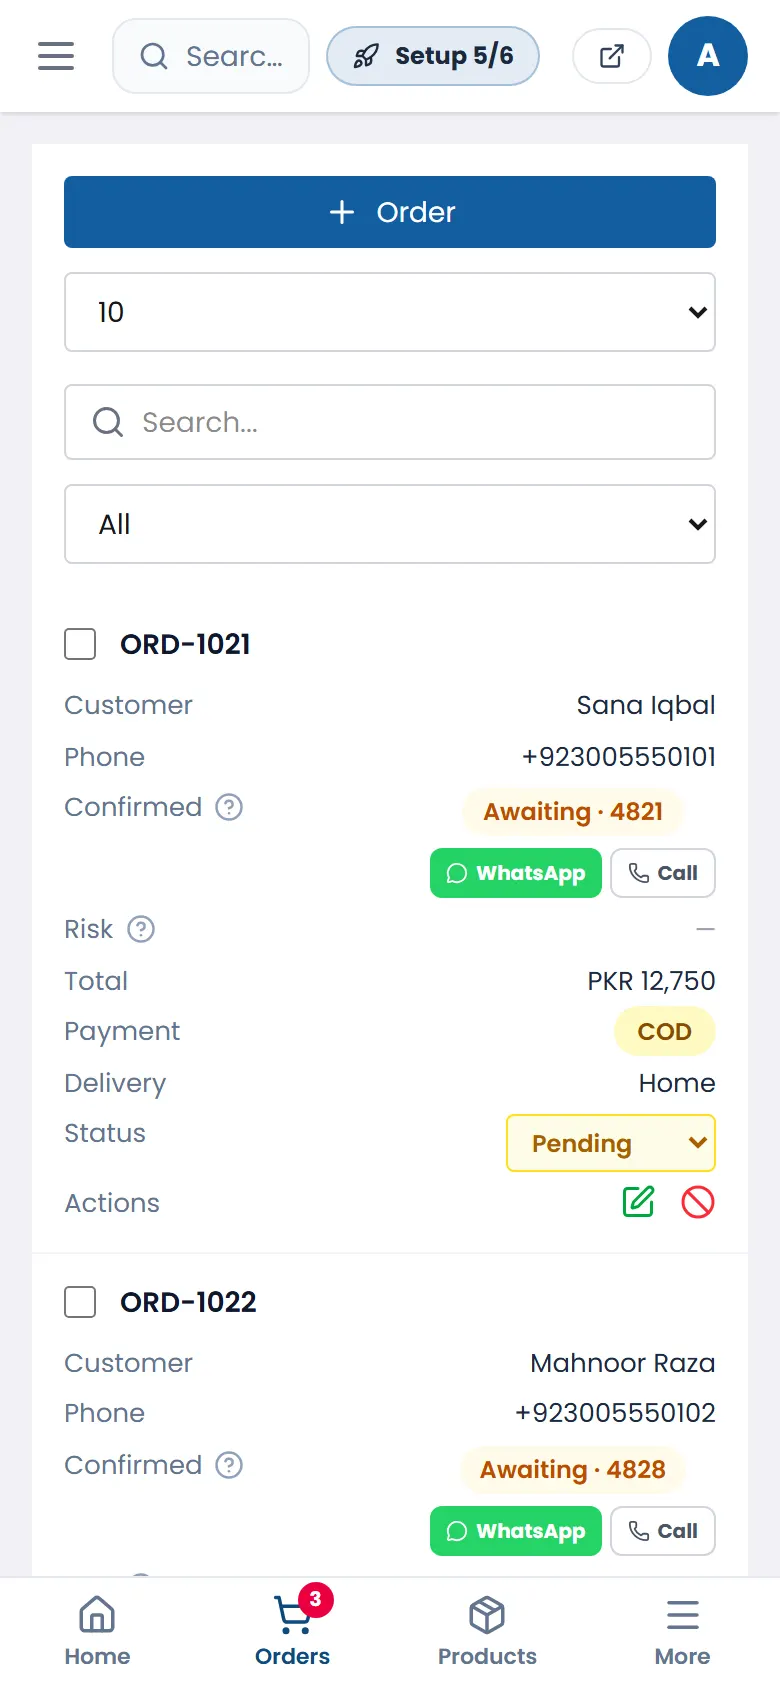
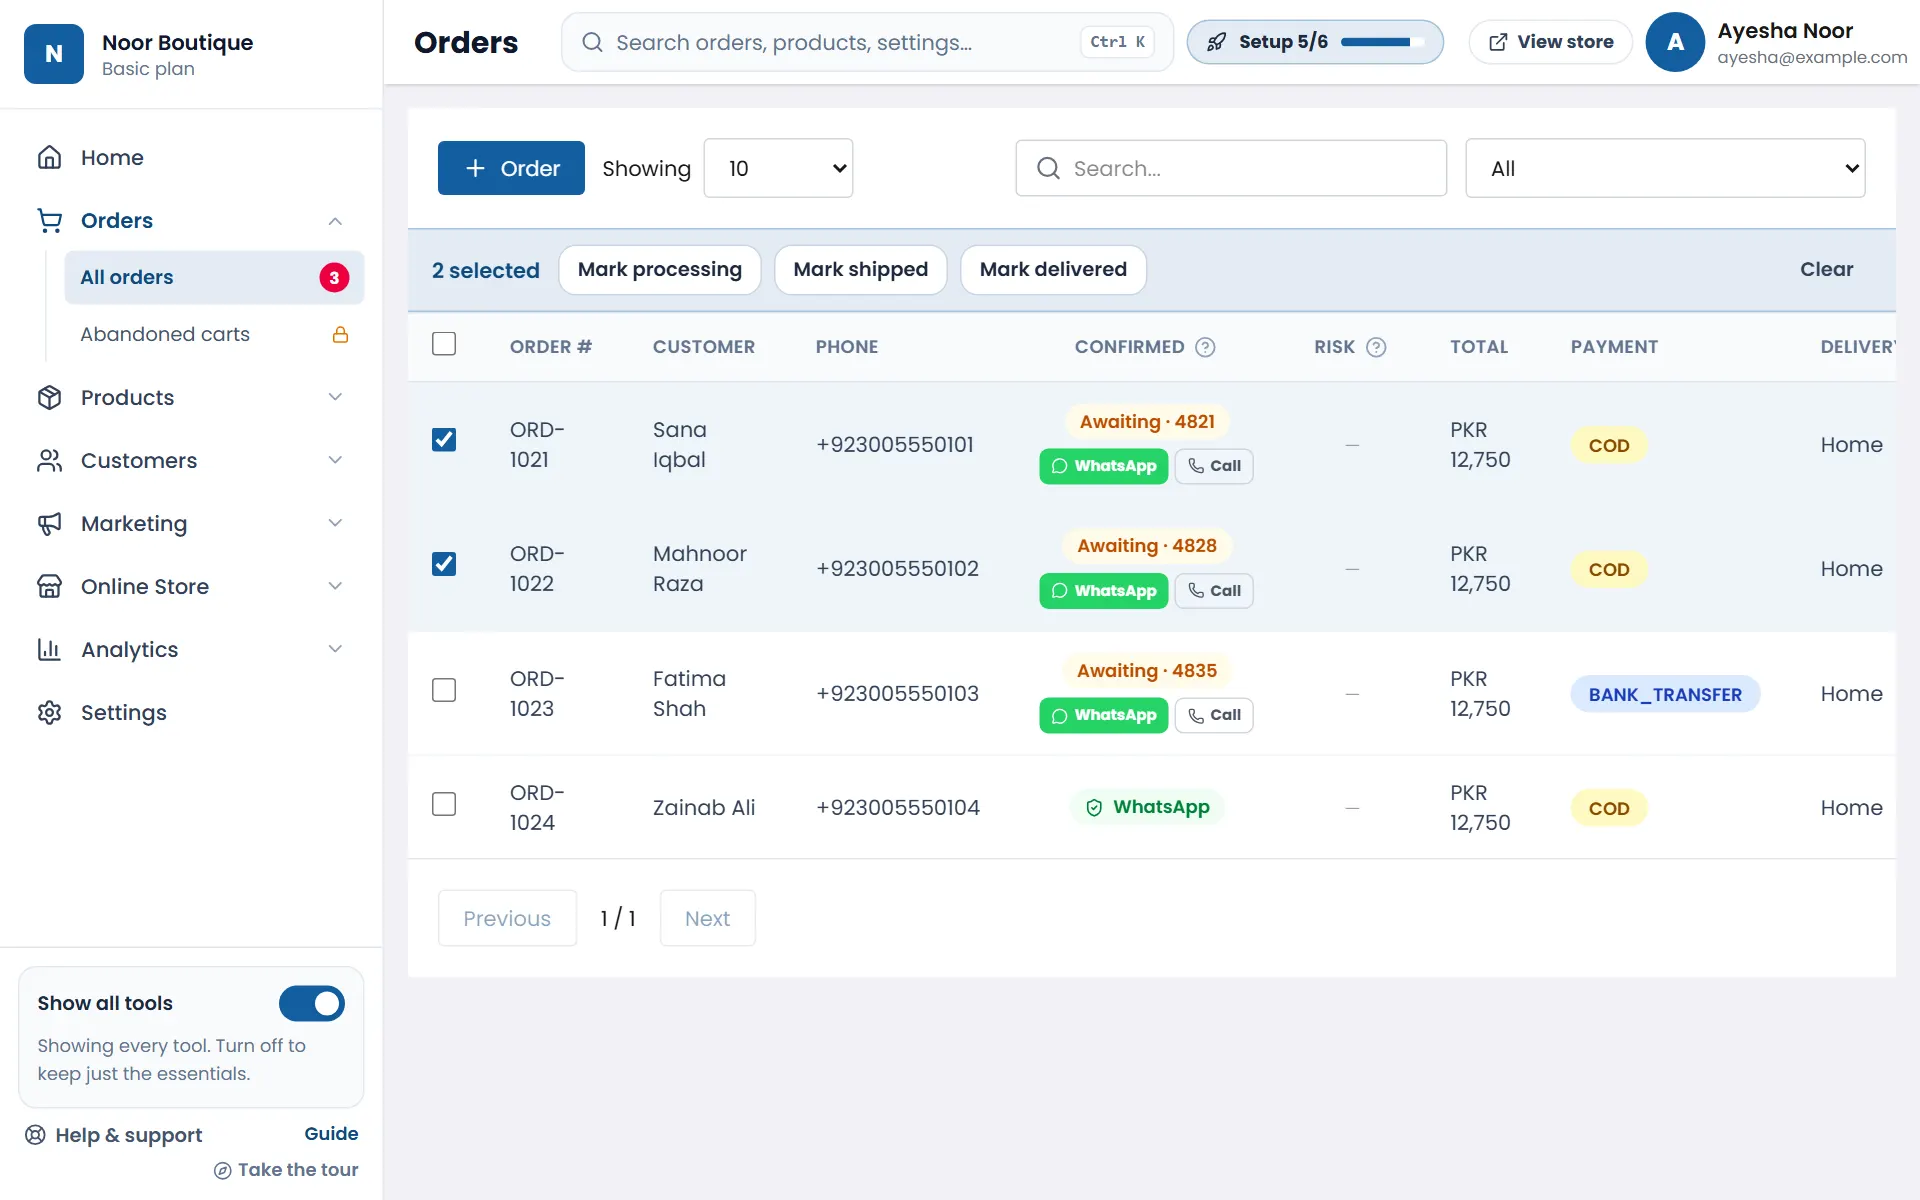
- 1While your dashboard is open, a New order message pops up when a customer orders. The red number on Orders shows how many are waiting.
- 2Every order gets a short code. When the customer sends it to you on WhatsApp, tap WhatsApp — or Call if you phoned them. An order must be confirmed before it can be shipped; this stops fake cash-on-delivery orders.
- 3To move several orders at once, tick them and tap Mark processing, Mark shipped or Mark delivered.
- 4Tap an order to see its items, payment, the customer's address and the courier — and to change its status, edit it or print it.
Use your own domain (optional)
Your store already has a free address — yourstore.asaanstore.com — and it always keeps working. If you own a domain like yourstore.pk or yourstore.com (bought from Hostinger, GoDaddy, Namecheap, PKNIC or anywhere else), you can open your store on it too. It takes about 10 minutes of setup.
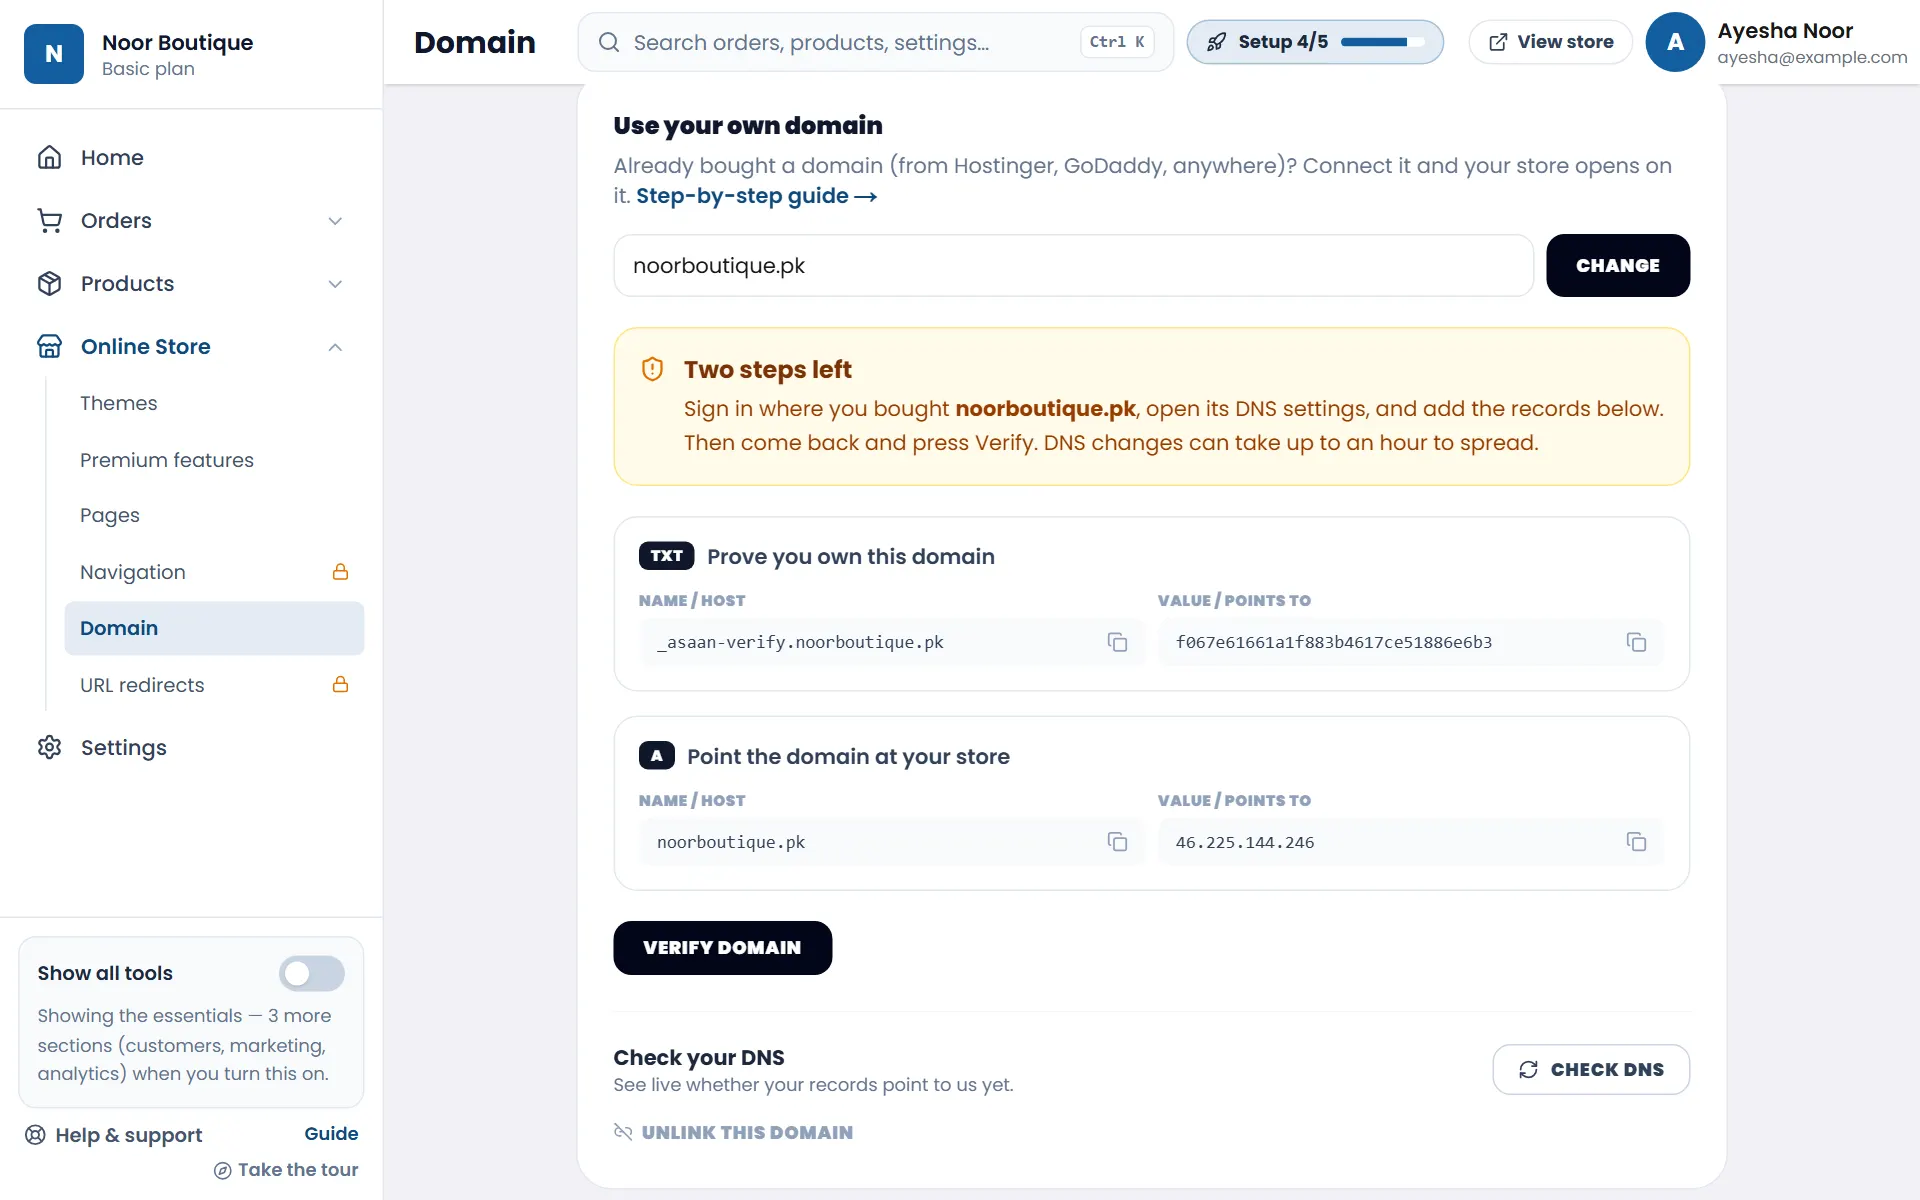
- 1Open Online Store → Domain. Type your domain without www or https:// — for example noorboutique.pk — and tap Connect.
- 2In a new tab, sign in where you bought the domain and open its DNS settings (often called DNS Zone or Manage DNS). Add the TXT record your Domain page shows — use the copy buttons for the Name and the Value. This proves the domain is yours.
- 3Add the A record — it points your domain at your store. If there's already an A record for @ (often a "parking" page), delete it. For www, add one more A record with the name www and the same value.
- 4Come back and tap Verify domain, then Check DNS — each record gets a green tick when it's found. DNS changes usually show within an hour.
- 5That's it: your store opens on your domain, and the secure padlock (https) is added automatically on the first visit.
| Type | Name / Host | Value / Points to |
|---|---|---|
| TXT | _asaan-verify | The code shown on your Domain page |
| A | @ | The IP address shown on your Domain page |
| A | www | The same IP address |
Most providers add your domain automatically, so in the Name box type only _asaan-verify, @ or www. If yours asks for the full name, copy it from your Domain page. Leave TTL on its default.
Premium features (Grow & Advanced)
The premium themes — Maison, Noor, Mega, Pulse, Atelier and Velour — come with extra shopping features. They show on your store only while a premium theme is applied, and you can switch each one on or off.
- 1Apply a premium theme (see Choose a theme), then open Online Store → Premium features.
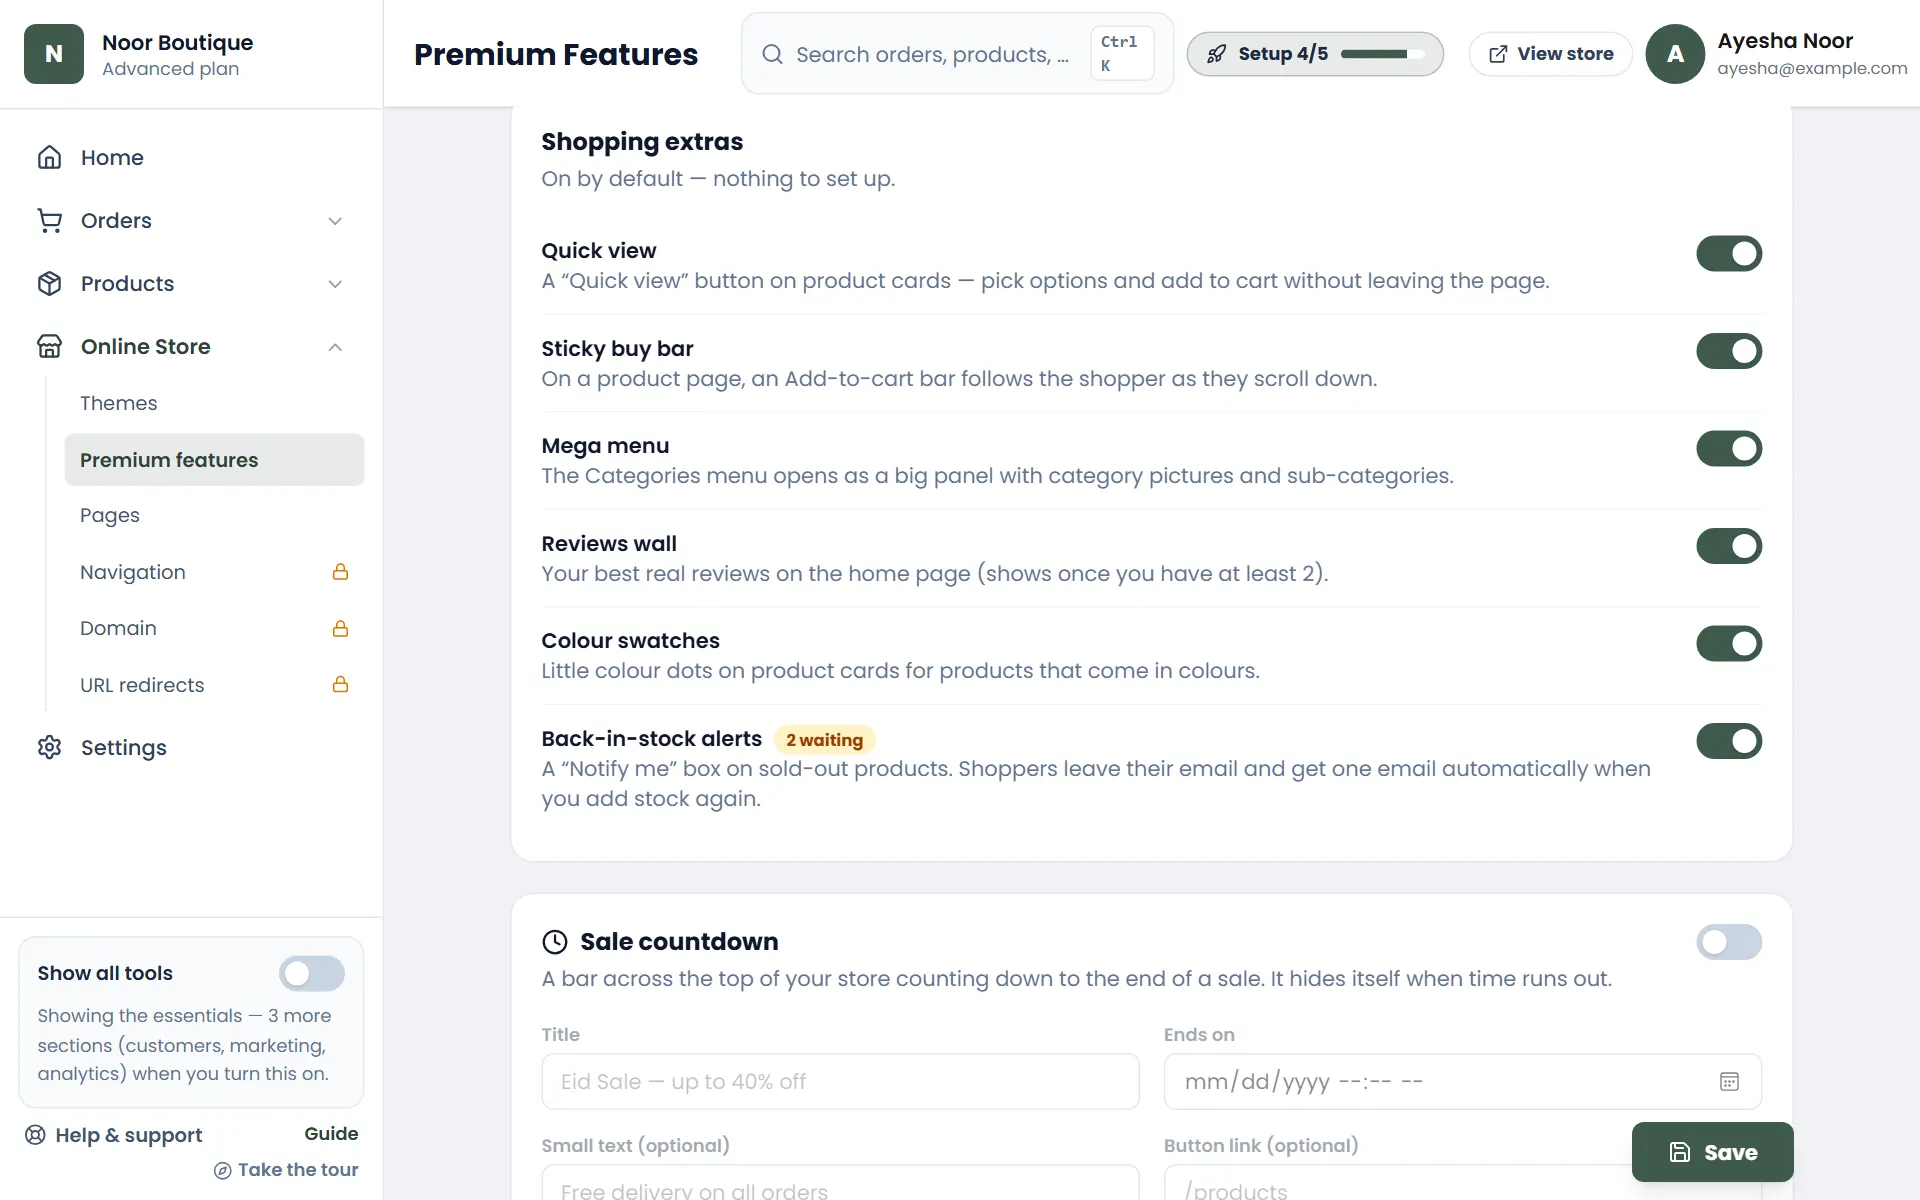
- 2Shopping extras are on by default — quick view, sticky buy bar, mega menu, reviews wall, colour swatches and back-in-stock alerts. Switch off any you don't want.
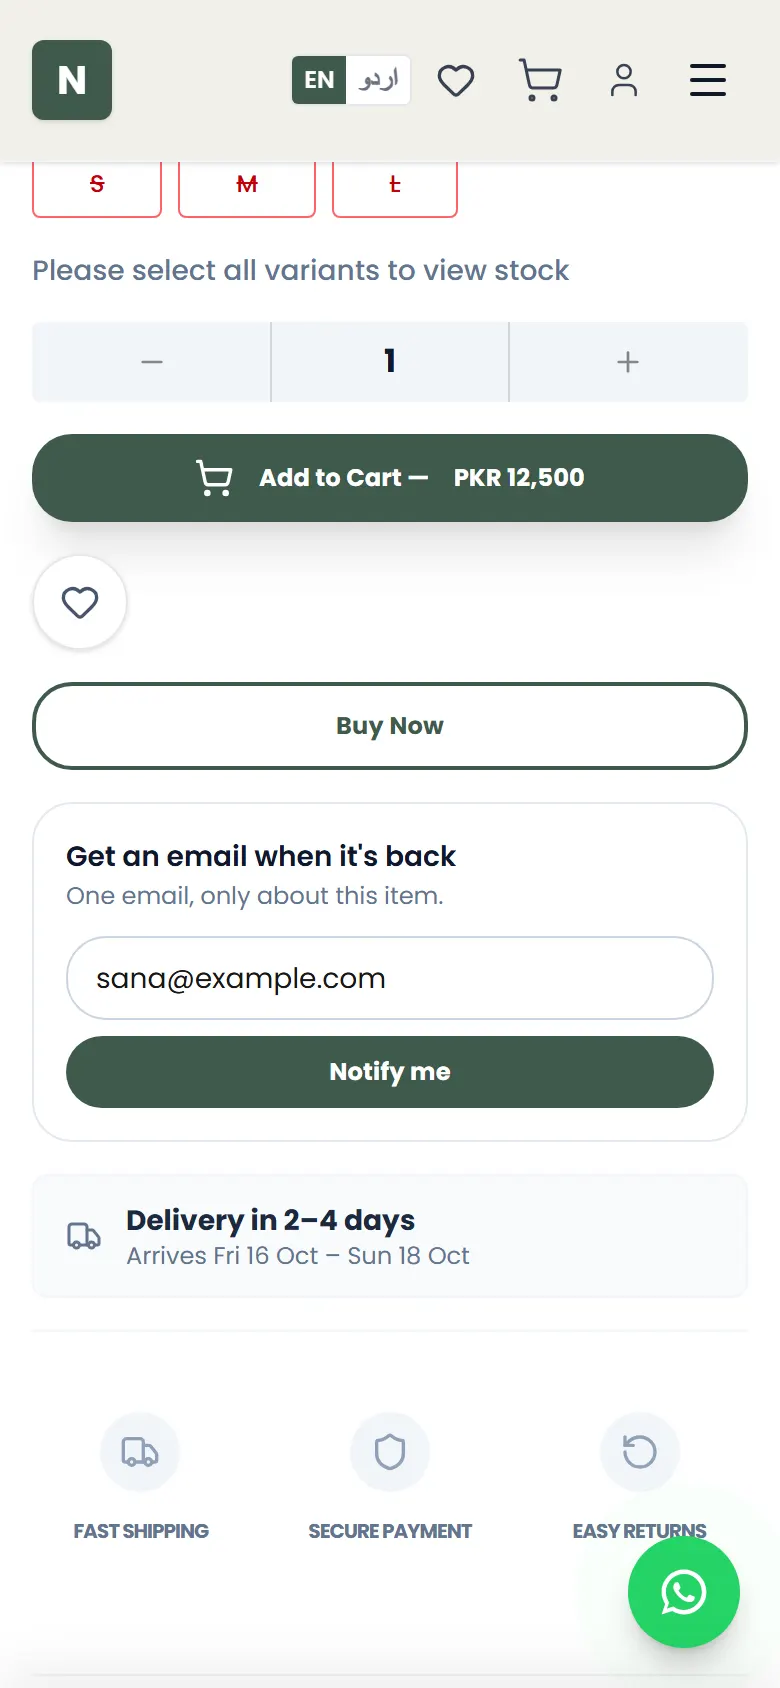
- 3Back-in-stock alerts: on a sold-out product (or a sold-out size or colour), customers tap Notify me and leave their email. The waiting number shows how many asked. When you add stock, each of them gets one email automatically.
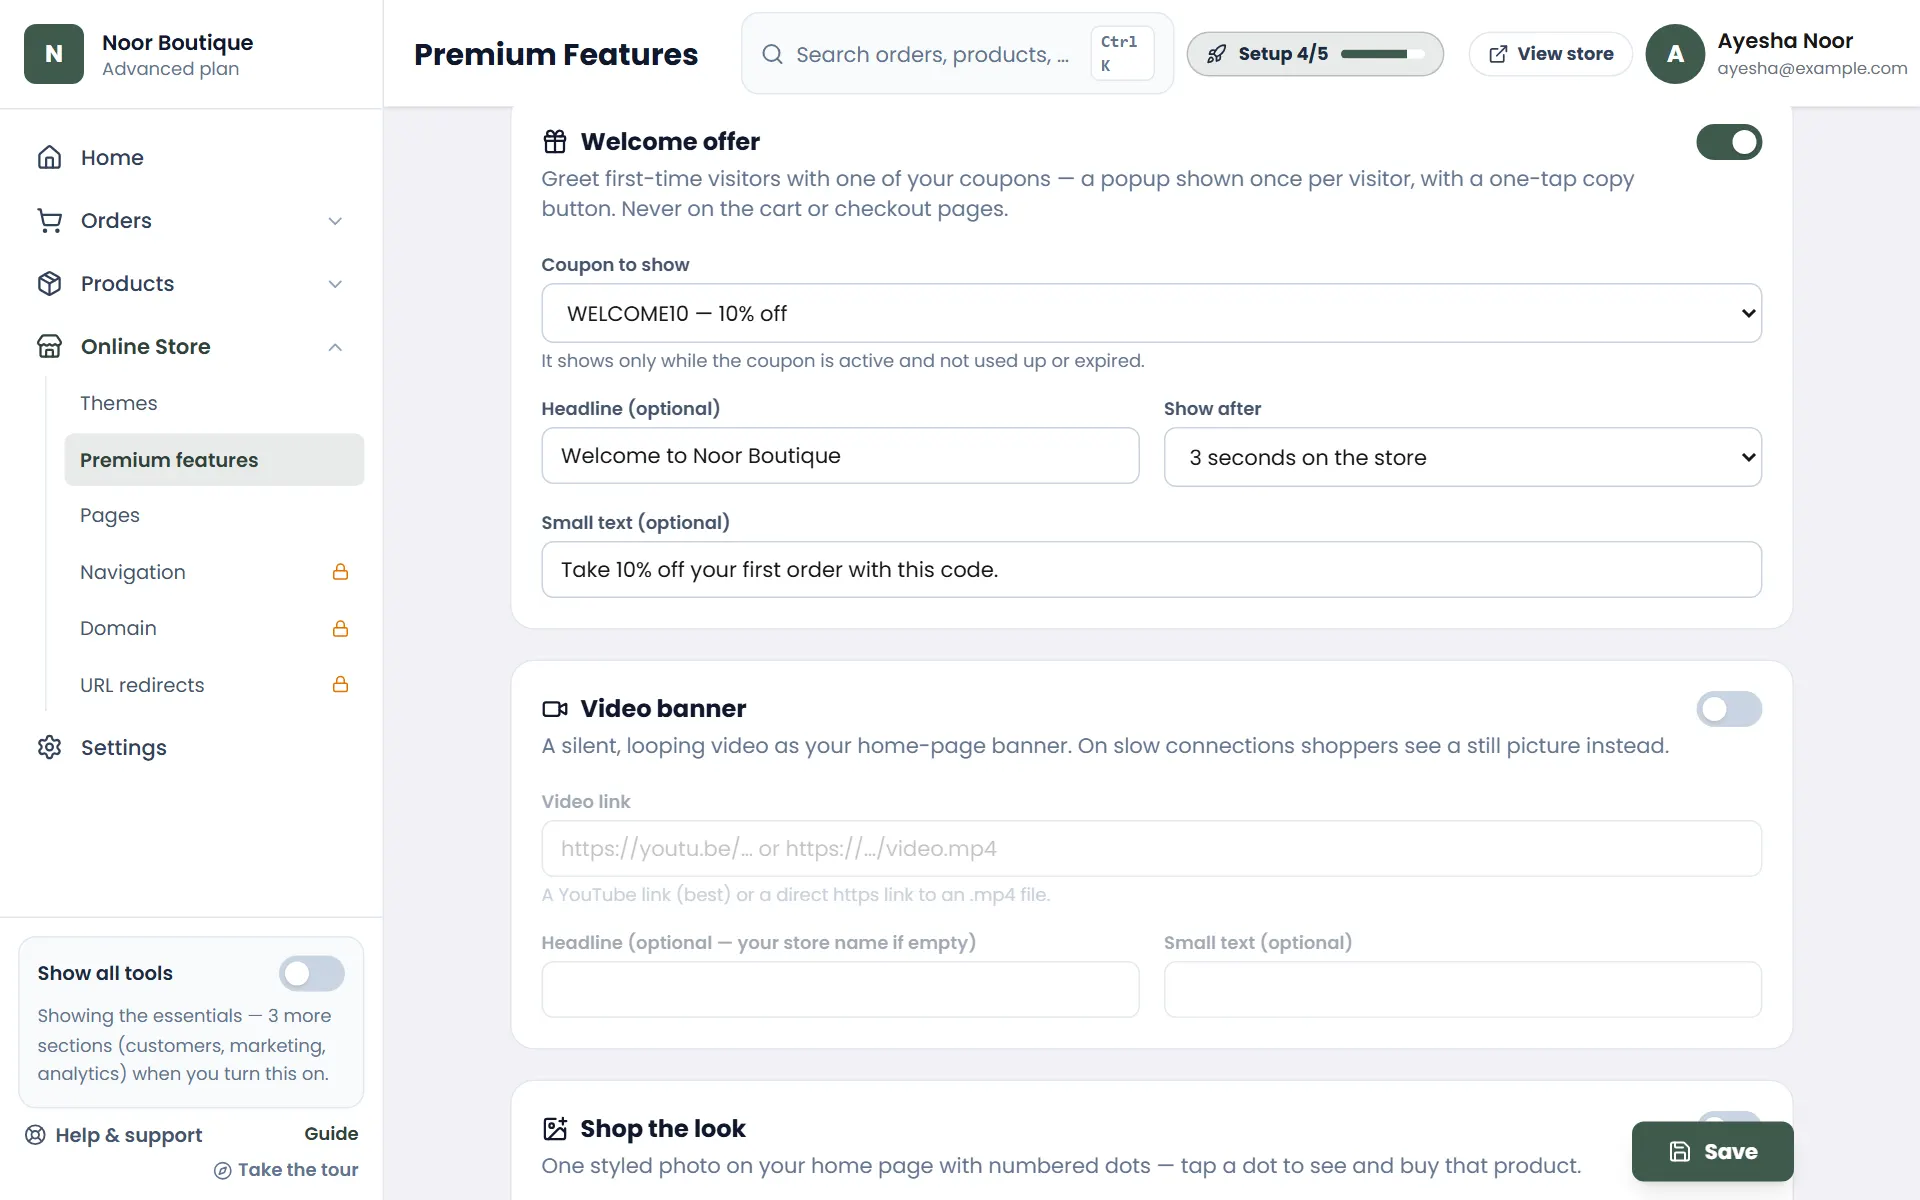
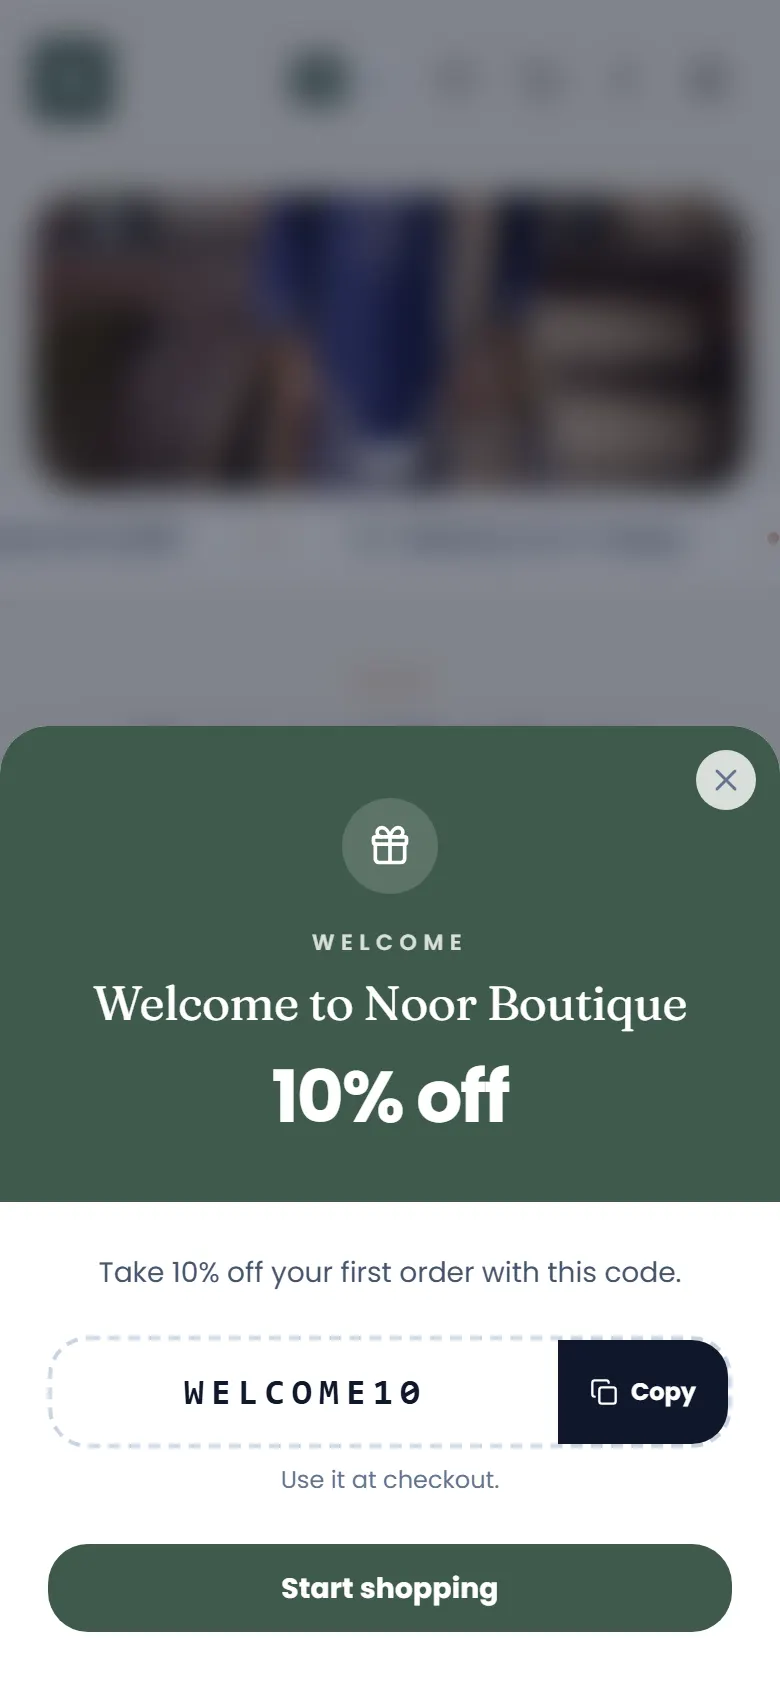
- 4Welcome offer (Advanced plan): first make a coupon in Marketing → Coupons. Then switch on Welcome offer, choose the coupon, write a headline, pick when it appears and tap Save.
- 5New visitors see the offer once, with a Copy button for the code. It never shows on the cart or checkout, and it hides itself when the coupon expires or runs out.
Questions
›I can't remember my store's address.
Go to asaanstore.com/login and tap “Find my store”. Enter the email you signed up with — we'll email you your store's address and a button that signs you in.
›I forgot my password.
Tap “Forgot password?” on your store's sign-in page, enter your email and tap “Send code”. Type the 6-digit code from the email (it works for 10 minutes), then choose a new password. Can't find the email? Check your spam folder — or use “Find my store” on asaanstore.com/login to get a sign-in link instead.
›Which email do I sign in with?
The email you used when you created your store — the one we sent the welcome email to. Your store's contact email (shown to customers) can be different.
›My store looks empty to customers.
Add at least one category and a few products with photos and prices. Your home page fills itself from your products — you don't have to design anything.
›Can I do all of this on my phone?
Yes. Everything works on a phone — Home, Orders and Products are in the bar at the bottom of your dashboard, and More (or the ☰ menu at the top-left) opens every other section. Adding many products is a little quicker on a computer.
›I can't find something in the menu.
New stores see just the essentials (Home, Orders, Products, Online Store, Settings). Turn on “Show all tools” at the bottom of the menu to see Customers, Marketing and Analytics too. Or use the Search box at the top (Ctrl K on a computer) and type what you're looking for — for example “delivery”, “coupons” or an order number.
›I closed the page before saving my product.
Open Products → + Product again on the same phone or computer and tap “Restore it” — what you typed is kept as a draft. Pictures aren't kept in a draft, so add them again.
›How will I know when a new order comes in?
While your dashboard is open, a “New order” message pops up at the top and a red number on Orders shows how many orders are waiting. Your Home page also lists them under “Needs your attention”.
›What does the little “?” next to a heading do?
Tap it for a short explanation of that part of the page — for example what “Confirmed” and “Risk” mean on your orders.
›Can I see the welcome tour again?
Yes — tap “Take the tour” at the bottom of the menu.
›Do I need my own domain?
No. Your free address (yourstore.asaanstore.com) works forever. Your own domain (like yourstore.pk) just looks more professional and is easier for customers to remember — you can connect it any time from Online Store → Domain.
›I connected my domain but my store doesn't open on it.
Open Online Store → Domain and tap “Check DNS” — it shows which record isn't pointing to us yet. The usual causes: an old A record for @ is still there (delete it), the records were added a few minutes ago (wait up to an hour, sometimes longer), or Cloudflare's orange cloud is on (switch the records to “DNS only”).
›Which themes come with my plan?
Starter: Classic & Fresh. Basic adds Soft & Coast. Grow adds Bold plus the premium Mega, Pulse & Atelier. Advanced has all 12, including Luxe, Maison, Noor & Velour. You can preview every theme on any plan — a locked one tells you which plan includes it.
›A customer tapped “Notify me” on a sold-out product. What do I do?
Nothing extra — just add stock to that product (or that size/colour) as usual. Everyone who asked gets one email automatically, with a link back to the product. Online Store → Premium features shows how many people are waiting.
›Do I have to pay now?
No. Pick the Free plan and pay nothing, for as long as you like — or pick a paid plan and try it free for 14 days. We send the first invoice before the trial ends.
›What happens if I don't pay at the end of my trial?
Your store moves to the Free plan and stays online — nothing is deleted. Free allows up to 10 products, so if you have more, remove the extras (or pay) and choose Free in Settings → Plan & billing.
Still stuck? We'll help.
Send us your product photos and prices and we'll help you add your first products.